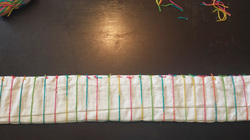
 My fellow dyers understand: nothing white is safe in my house. I've dyed all of my kids' old diapers that I now use as washcloths and dish towels. And since discovering the world of DIY baby carriers, I have wanted to try a mei tai. I meant to make one with some of the osnaburg I bought online through fabric.com, but then I found buried in my linen closet the white tablecloth my mom gave me ages ago. Perfect! It was just begging me to do something to cover the stains it had acquired over the years. I am a huge fan of rainbows (specifically, rainbows and unicorns and neon colors - what can I say? I'm an 80s/90s Lisa Frank kid). I have seen people dye rainbows and they always seemed to use separate dyes for the secondary colors: orange, green and violet. I wanted to try it with only the 3 primaries: red, yellow and blue. First, I prepped the tablecloth, which measures about 67" x 80" by washing it on a normal cycle on hot. I scoured it in my large canning pot, adding 1 cup washing soda and 1 tablespoon blue Dawn dish soap to the water, which was just enough to cover the fabric. I let it boil for at least 30 minutes. After rinsing, I filled my pot back up with water and another cup of washing soda. I set the fabric inside and left it. This step is very important if you want vibrant colors. You can let it soak for days, if you like, but the minimum should be about an hour. I work outside the home and have a busy schedule, so it ended up soaking for almost a week before I got to dye it! When I was ready, I wrung the fabric out and placed it in my washing machine. I set it to spin cycle, and when it was done it was damp and not dripp ing. From here, I folded it in half and then did an accordion fold (below). Since I will be making a mei tai from this fabric, I am not terribly particular about the direction of the stripes, but I knew I wanted to repeat the spectrum a few times down the length of the tablecloth. 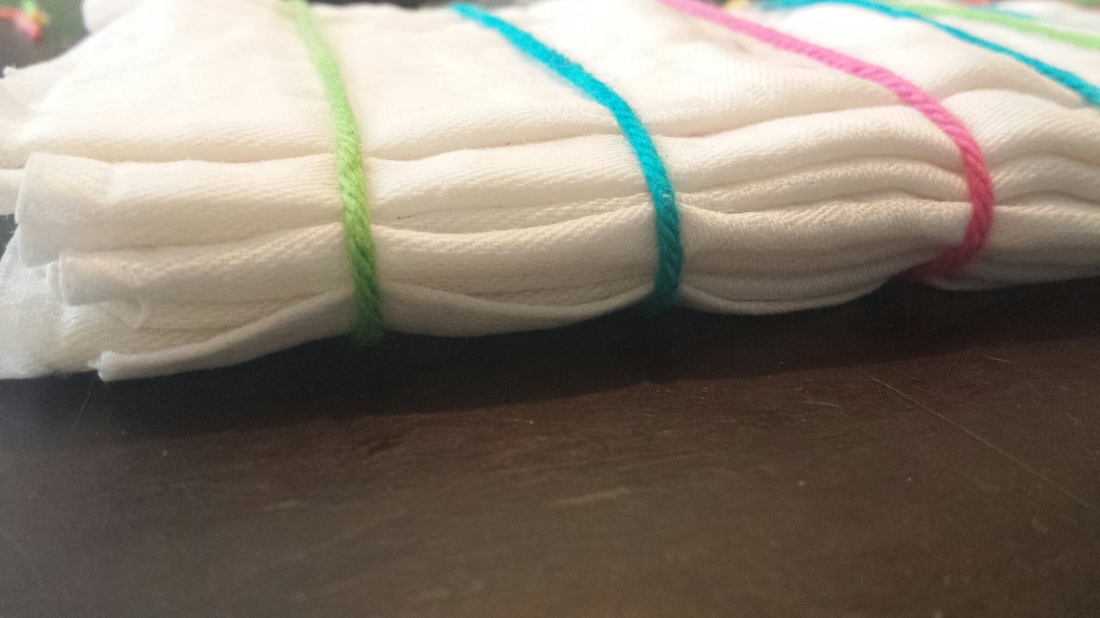
 After folding, I tied it loosely in increments to separate the colors. I used yarn because I didn't want the lines to be distinct. f you want white lines in your design, you would tighten the strings and/or use rubber bands and tie them tightly. (My lovely rainbow yarn is one of the best purchases ever; I've used it for several projects and hellooooo, it's RAINBOW!)  Red, blue and yellow dye Red, blue and yellow dye After prepping my fabric, I premixed my dyes. For this project, I used two packets of Tulip brand fiber reactive dyes: Red and Yellow. For the blue, I used two teaspoons of Dharma's Procion dye, Turquoise #25 (available only online at Dharma Trading Company). I followed the directions on the packets for the red and yellow, but I accidentally diluted the yellow dye too much (insert sad face). For future projects, I will most likely be using the Procion dyes again; I really love how vibrant the colors stay after rinsing, and it is a better value for the same amount of money I pay for the cheaper store brands. I have a roll of brown paper that I use for just about everything from tie dyeing to drafting sewing patterns to DIY floors (yes, you can "tile' your floor wth brown paper and polyurethane and I've done it!). If you don't have any, newspaper or brown paper bags from the grocery store will work. You won't want to use plastic; I know that it *sounds* like a good idea, but any dye runoff will have nowhere to go except back into the fabric and can trickle down to unwanted areas. For maximum control over your dye, use an absorbent, disposable dropcloth. Now comes the fun part! To start, if you think it will help, you could notate on your brown paper which section is assigned to each color. I didn't need to, but in order to avoid getting confused at which color I was on, I skipped the secondary colors. To do it like this, here are your directions: 1. Red 2. (skip) 3. Yellow 4. (skip) 5. Blue 6. (skip) 7. Go back to section 2 and add a few squirts of red, immediately followed by several squirts of yellow. Allow the colors to mix. 8. Go back to section 4 and add a few squirts of blue, followed by several squirts of green. Allow to blend through and underneath the ties if you are wanting to avoid white lines. 9. Go back to section 6 and add a few squirts of blue, followed by several squirts of red. Allow the red to bleed into a red-violet color so that the top of section 6 is indigo that fades into violet (a true spectrum). 10: Repeat. I find it a LOT easier to skip the secondary colors. It prevents unwanted bleeding, as well as keeps you from forgetting what color you are supposed to be on. It's easy to get carried away! For the first set of stripes, you will have something that looks like this: 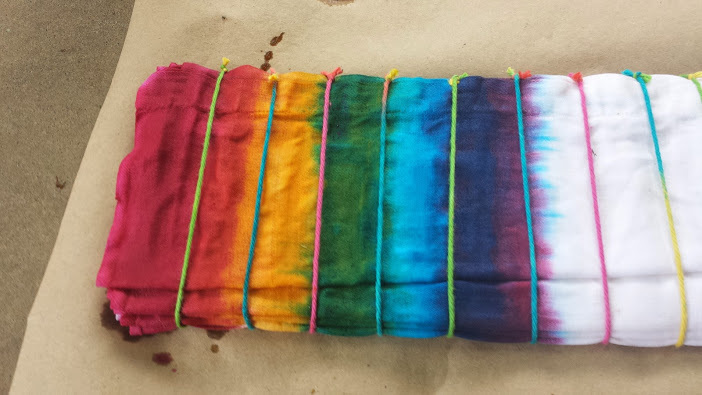
Continue the process all the way down, skipping the secondary colors for each spectrum: 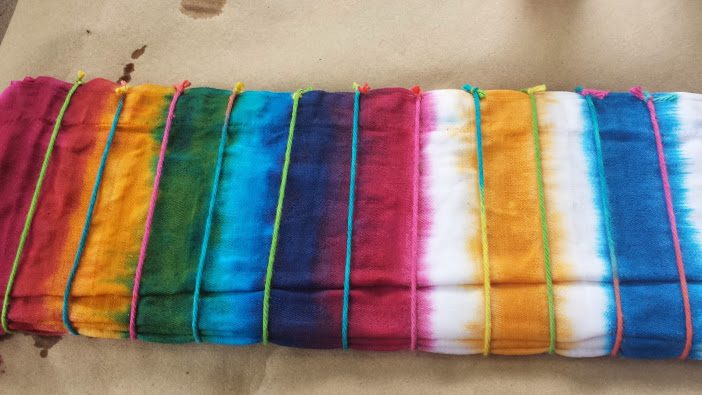
Skipping the secondary colors
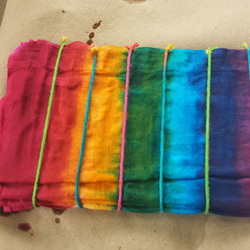
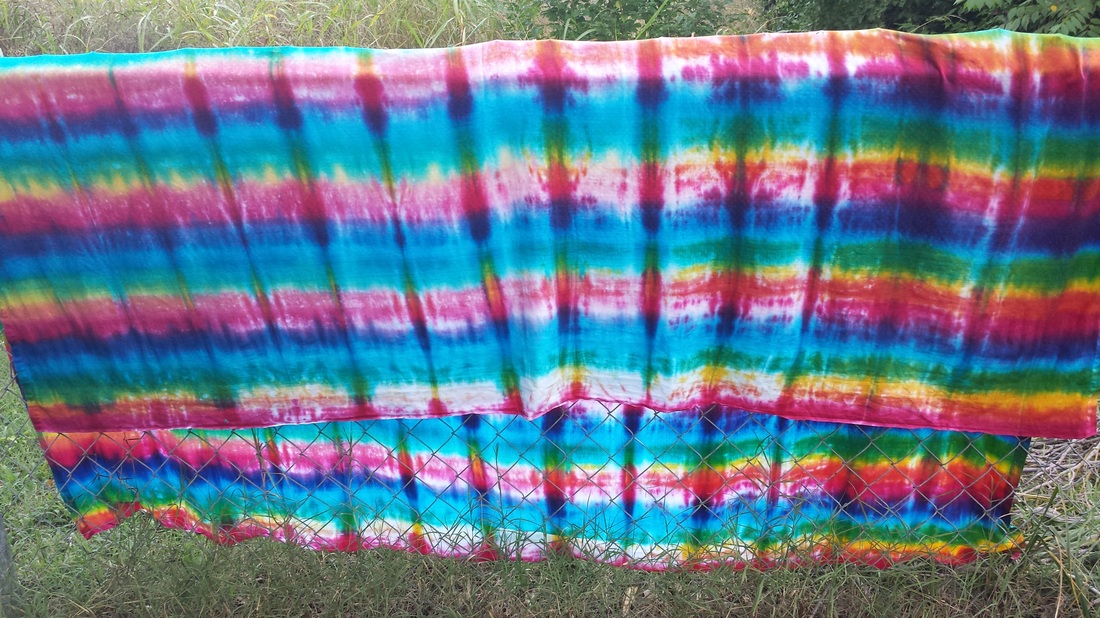
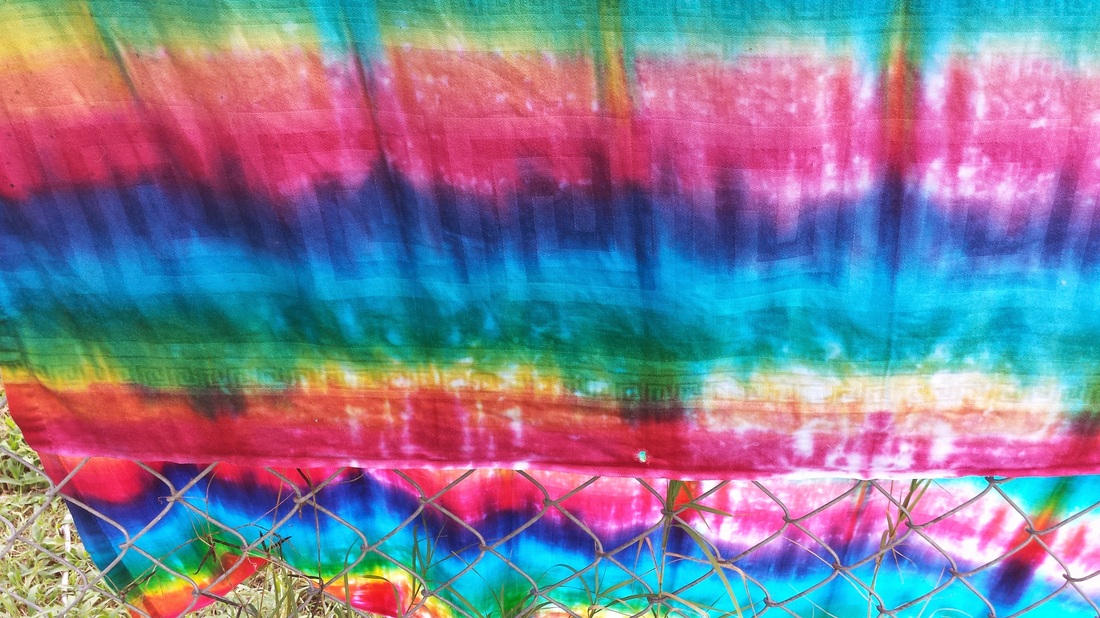
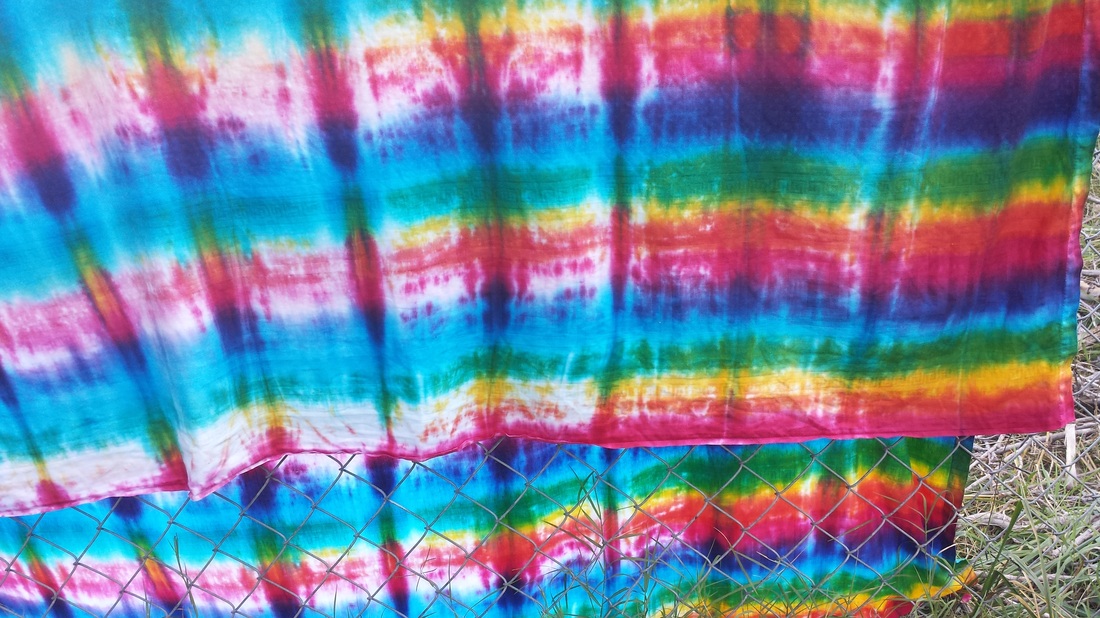
Once you get to the end, get a new piece of brown paper or newspaper and flip the whole thing over. Repeat for the other side. Be sure to get in between the folds as much as possible; I missed a few folds and the dye did not penetrate, giving me more white than I wanted (sad face!). After it is finished, place the fabric into a large garbage bag and set it in the sun. I set mine in my backyard, in direct sun, for 24 hours. To rinse, I threw the whole thing, ties and all, into my washer. Rinsing is my least favorite part about dyeing; this step is one I learned from the pros, and I had my doubts, but it turned out to be WAY easier than crouching over my bathtub or standing in my front yard with the hose, waving at the neighbors as they raise their eyebrows at the crazy hippie lady soaking herself with water and dye. After a cold wash and rinse, I was just too impatient to do another wash, so I pulled it out and took a peek at it. And....voila! After ooohing and aahhhing, I put it into the dryer to let some heat set the dyes some more, then did another cold wash before I did a hot wash and dry. The colors faded a bit, but not enough to make me disappointed. I did notice that the yellow did not penetrate as well as I had hoped, but overall, I am satisfied with it and I think it will make a good mei tai.
Stay tuned for my tutorial on converting this into a mei tai baby carrier!
0 Comments
Leave a Reply. |
Archives
August 2015
Past ProjectsCategories |
 RSS Feed
