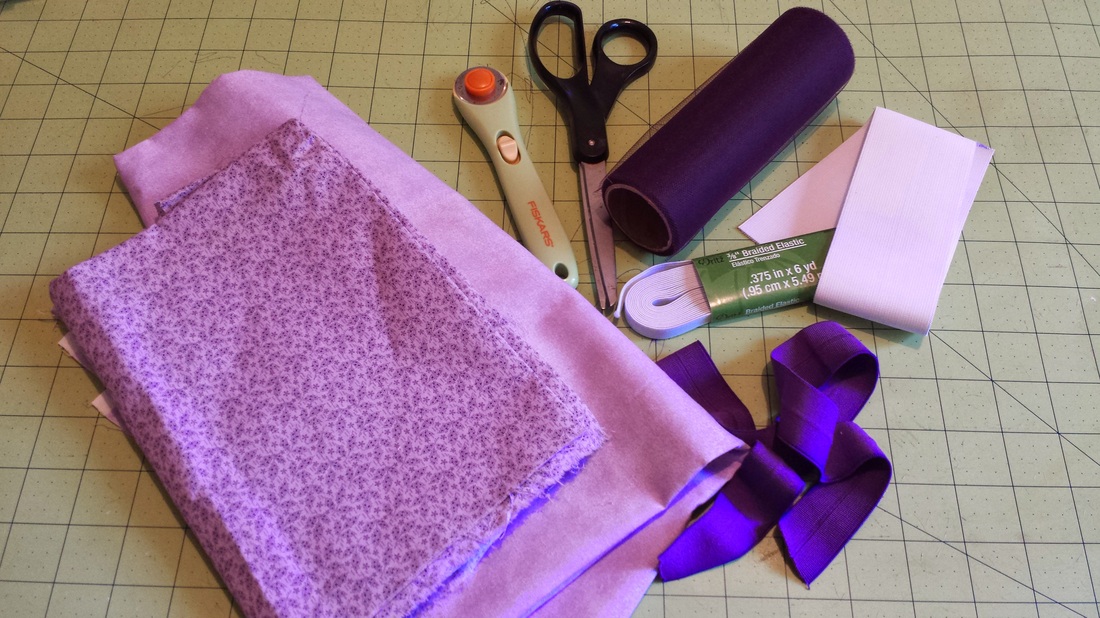
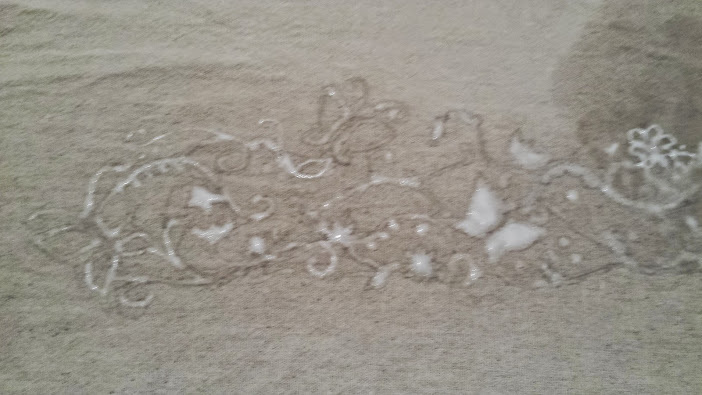
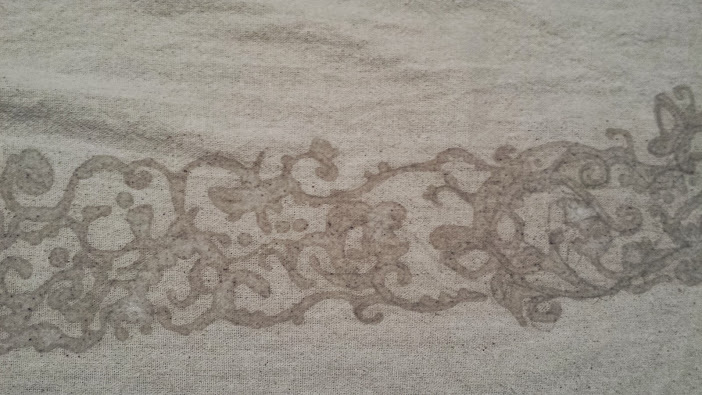
 This past week, I have been working fervently on a wrap ordered and paid for by a friend. It was my first paid dyed wrap job and I was excited to get started on it. It's all ready to ship out, but before I say goodbye forever to my creation, I will share it with you. My friend told me what colors and style she was thinking of, and gave me some "artistic freedom" in deciding the logistics of the design. I settled on professional Procion dyes orderd from dharmatrading.com and ordered the osnaburg natural, pre-shrunk fabric from fabric.com (it says pre-shrunk but I knew better and ordered extra. It ended up shrinking about half a yard lengthwise). I knew I would be doing a grad dye and chose Turquoise (#PR25) and Fuchsia Red (#PR13). Both of these are primaries, meaning that they will mix together perfectly. There are dozens of pinks and blues to choose from, but some of the other shades are mixed with other colors and I only wanted pure pink and blue to ensure that when they mixed on the fabric, they would turn the right shade of purple. After prewashing, measuring, hemming and scouring, I dried my fabric and started the glue resist. I tested it on several scraps of fabric. My initial plan was to just brush over a piece of still craft lace that I had in my craft closet. Boy, did I ever underestimate just how hard it is to stencil lace with glue! Needless to say, all of my attempts to stencil a lace design with Elmer's glue failed miserably. I tried watering down the glue, dampening the fabric, printed out stencils from Google Images and cut them out with an X-acto knife, and using a lace curtain I have. None of them came out as detailed as I wanted it to be. So, freehanding it was! About 4 whole yards of it. It took me hours, but was pretty happy with how it turned out.
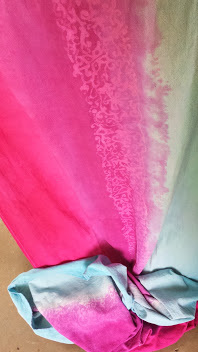
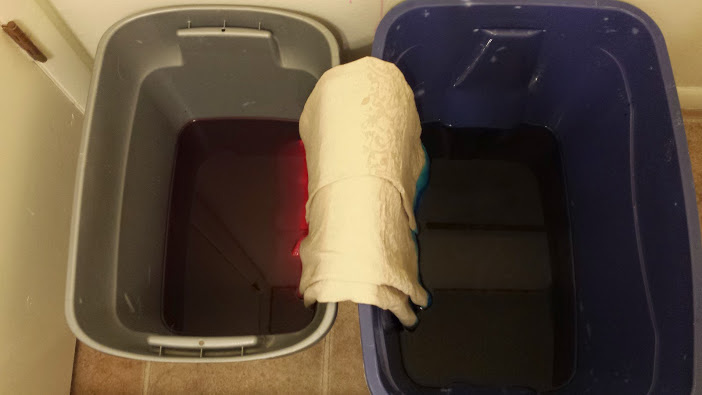
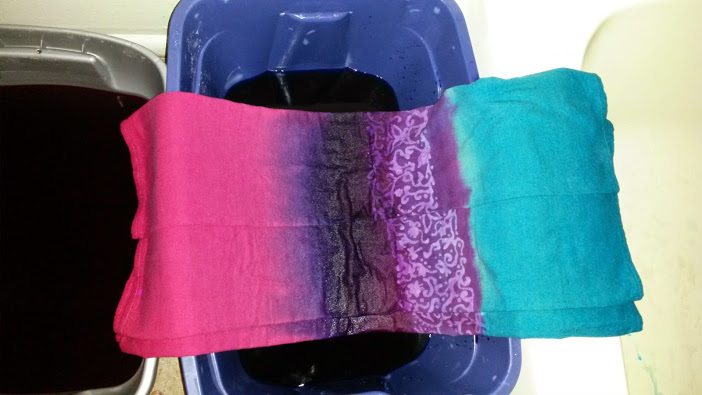
I did a grad/ombre dye effect in the fuchsia dye on one rail, turquoise on the other. Where they met in the middle, I added purple made up of both of these colors, mixed in a squirt bottle.
Unfortunately, most of the purple washed out. It was just too diluted. The glue washed out, as well, making it impossible to re-do, but in the end, after the wrap was rinsed and dried, the purple is still visible. After a few hiccups (having to re-dip the rails for deeper colors), I finally got the end result I was looking for: bright, vibrant fuchsia and turquoise, with a delicate lace design running along the middle. Depending on the type of carry being used, the lace stands out beautifully. My friend is thinking of converting it to a ring sling, which I think would be perfect, as well, and will showcase the subtle purple splendidly. So, since my little diva was not in the mood to play, I had to practice with Teddy. I learned that teddy bears are actually more difficult to wrap, having no knees or weight in their seat! But here it is: 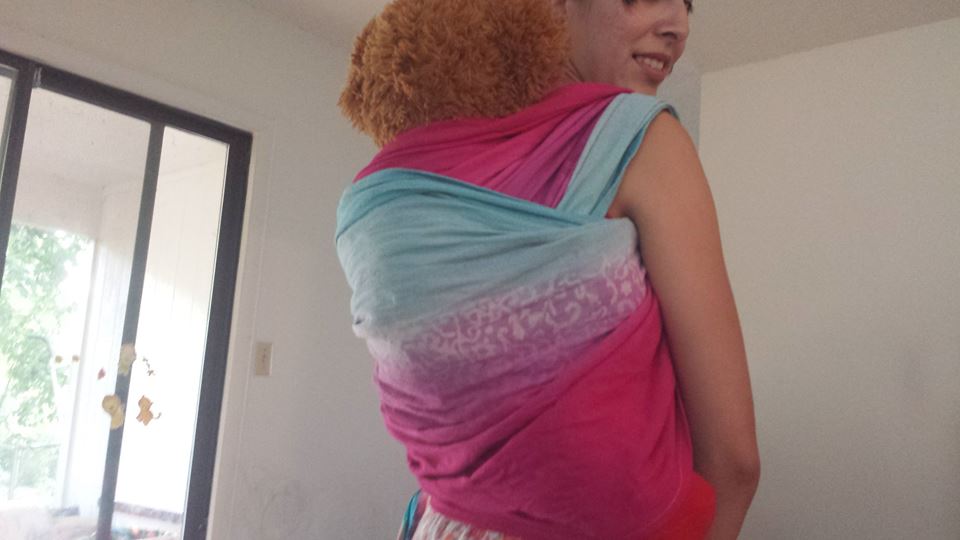 I am still a novice dyer but am learning it quickly and am loving it so far. Another project I worked on simultaneously was a Batman tie-dye shirt for my son, and another dish towel. Unfortunately, the Batman shirt was a bit of a fail. My son loves it, but I will be attempting it again soon to perfect the batwing! As for the kitchen towel/unpaper towel, I attempted my first heart design and loved how easy it was, and how it turned out! 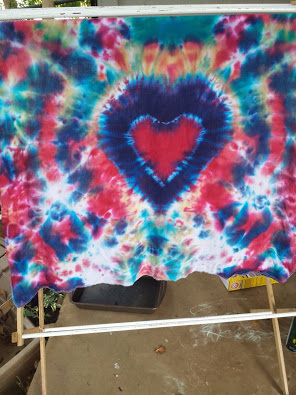 Double hearts! I also completed a Rainbow Tablecloth, which is posted as a separate tutorial here on my blog. Check it out!
I hope to get more tie dyeing jobs in the future. This was a lot of fun, I learned so much along the way, and I get to see someone else enjoying and using my creations. Win-win! For more information on how to order your own custom-dyed fabric from me, click here. Until next time...!
0 Comments
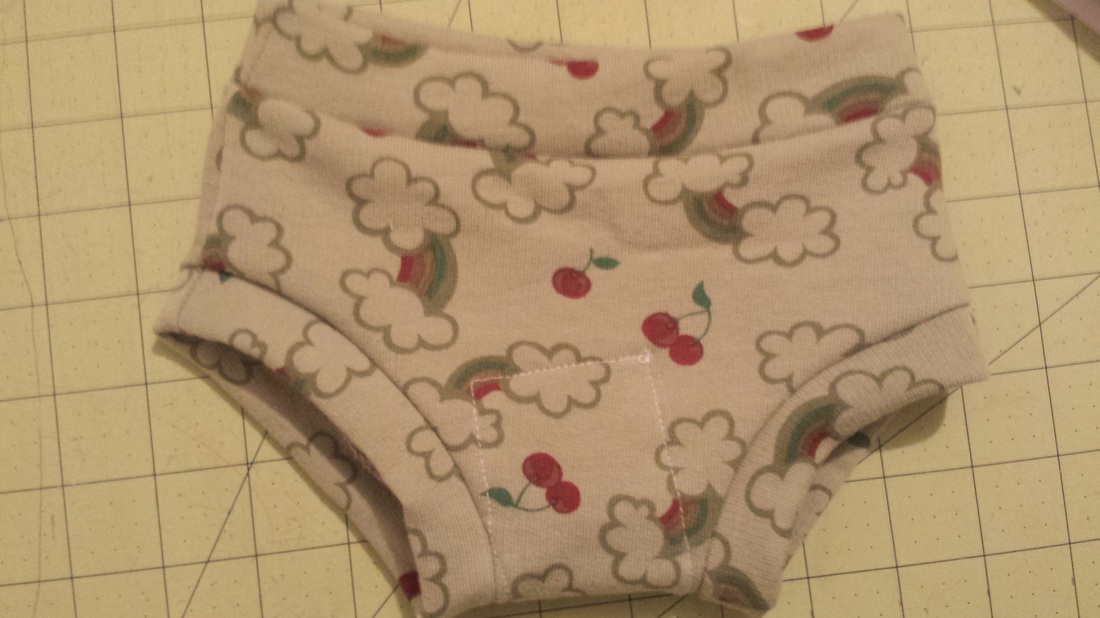
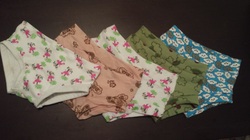 Aptly named after my little girl, the Super Girl Undies are perfect for early potty trainers. My girl doesn't turn 2 until the end of next month and is getting pretty thinned out as she grows taller. We didn't expect her to potty train so quickly, and I was totally unprepared. For the first day, she had to borrow her brother's underwear! They are a trim fit, thin and easy to take off and slip on. The best part is that they take only about 15-20 minutes to make, including cutting and assembly, and do not require elastic, hemming or bias tape. To start, you will need a cute knit fabric. The cuter, the better! You can use any type of cotton knit, interlock, jersey or even thermal. Anything that has a very good stretch will work, but if this is for underwear, you will want to stick with cotton and natural fibers. Of course, you could use this pattern for swim bottoms and use a nylon swimsuit material! Materials:
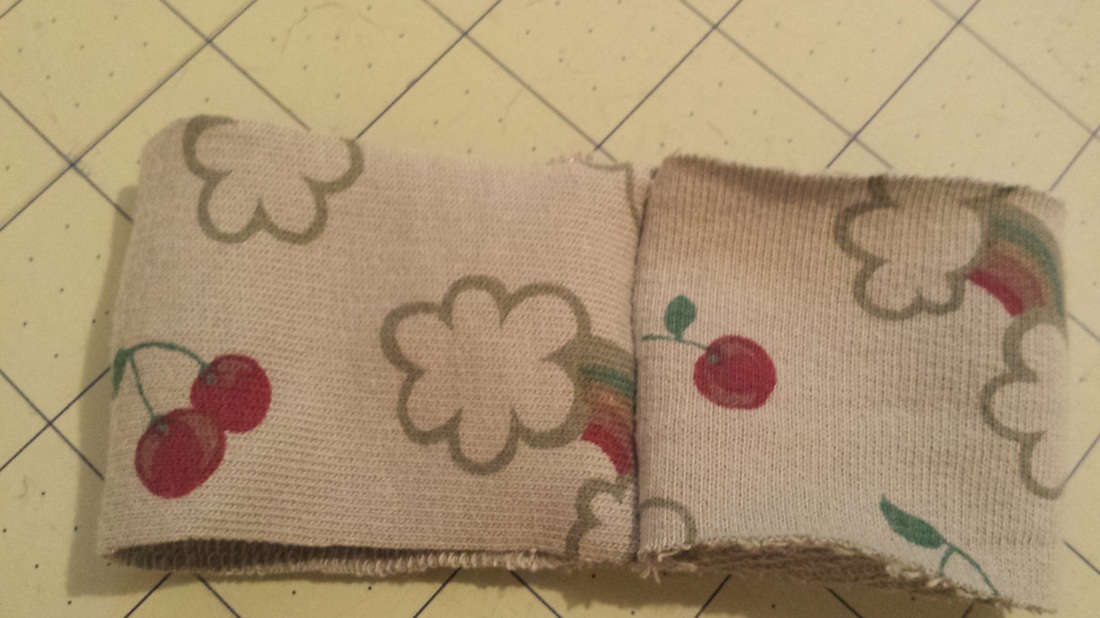
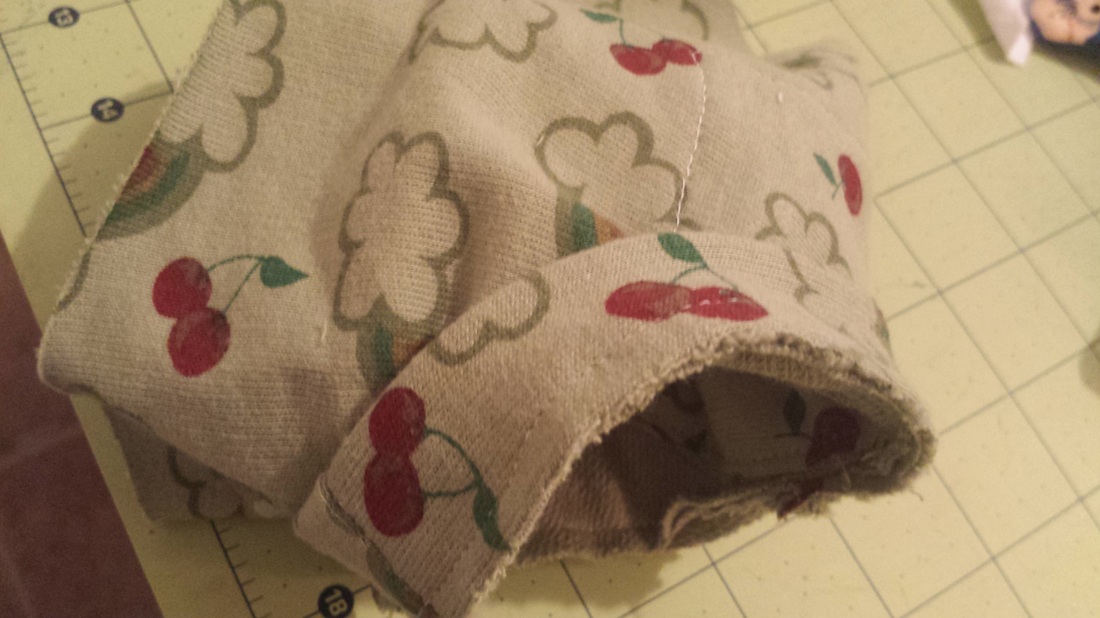
Instructions: Print out your pattern. Make sure that your printer settings are adjusted to print the page out as "Actual Fit". Cut out the two pieces. Fold your fabric in half and lay the pattern pieces on the fabric as directed. You will notice that the pattern piece will tell you which direction the stretch needs to go. This is very important, because if you cut it the wrong way, your undies will not stretch over your child's hips. Cut on the fold, one of each. Next, you will need to cut the leg bands and the waistband. The leg bands will be small strips measuring 5" long by 2" wide. Cut four of these with the stretch running lengthwise across the strip. For the waistband, you can either cut one long 15" x 3" piece, or two 7.5" x 3" pieces that you would sew together to make one long piece. If you are using less than 1/4 yard of knit and using up scraps, this is a good way to fit your waistband. Make sure that the stretch is lengthwise across the strip, maximizing the stretch. You will have the following pieces:  Next, sew the front and rear panel together by placing the right sides together and sewing along both sides and the bottom. When sewing with knit fabrics, I like to use my serger, but for these, I just used my regular Singer sewing machine. To avoid puckering, adjust your settings to a longer stitch length and loose tension. 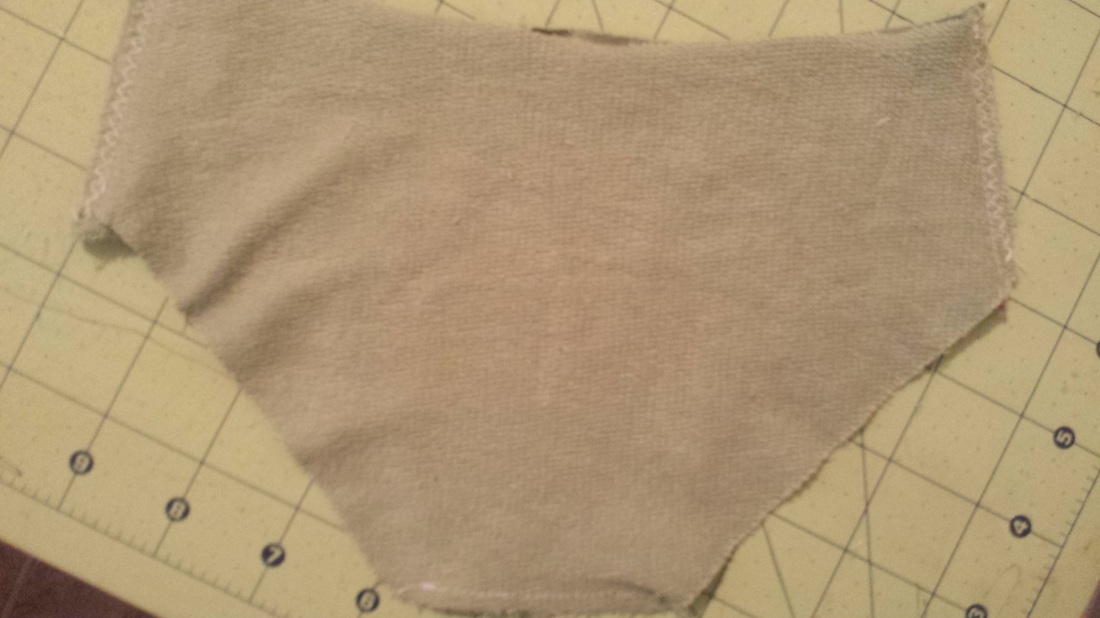 You can turn it right side out and set it aside, or you could choose to sew some extra padding/soaker panels into the crotch area. To do this, I cut two more 5"x2" pieces (stretch is not as important for this step, so use some scraps, or choose a more absorbent material if you are using these as trainers). Pin them to the inside and sew down. I was not paying much attention and accidentally pinned them down crooked, so you might want to take more more and straighten it. Oops! 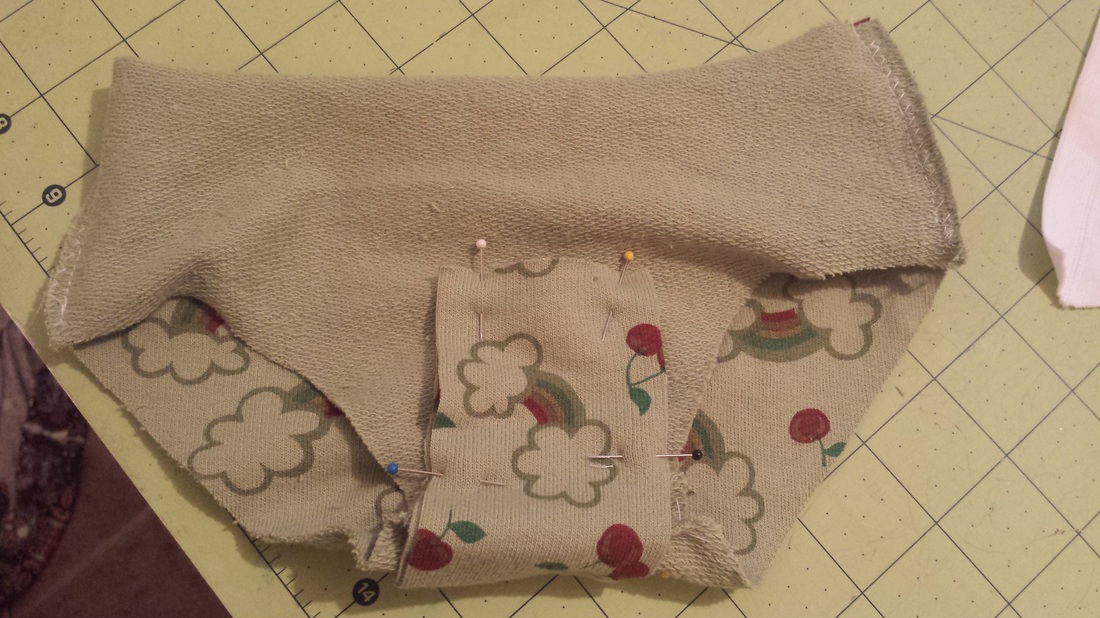 Now you will take two of your leg band pieces and. with right sides together, sew both ends closed. Turn it inside out and repeat with the other leg band
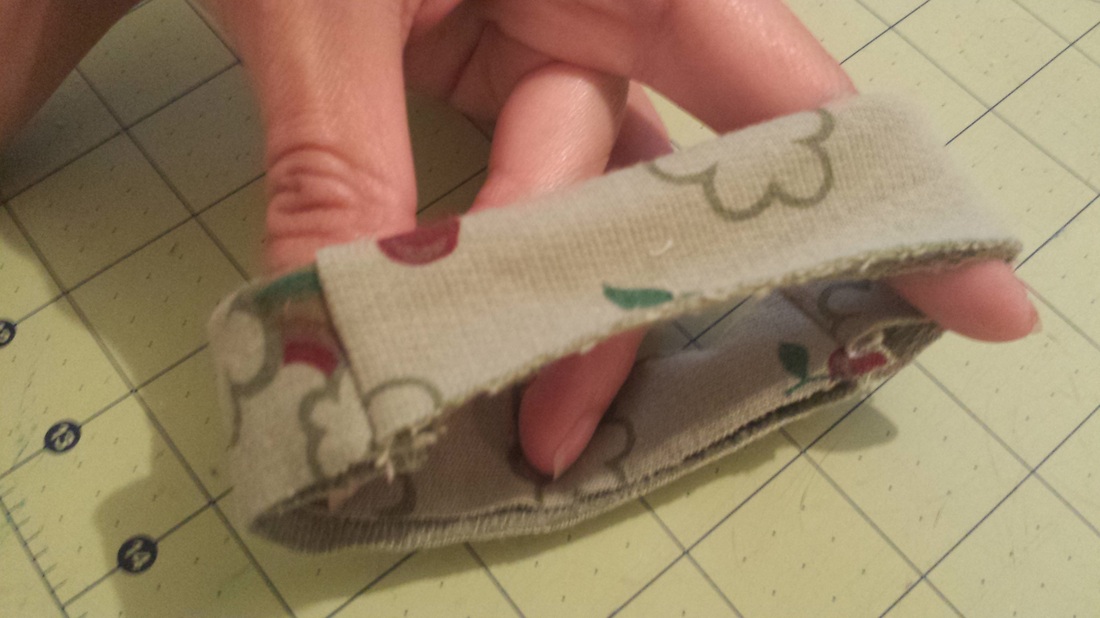
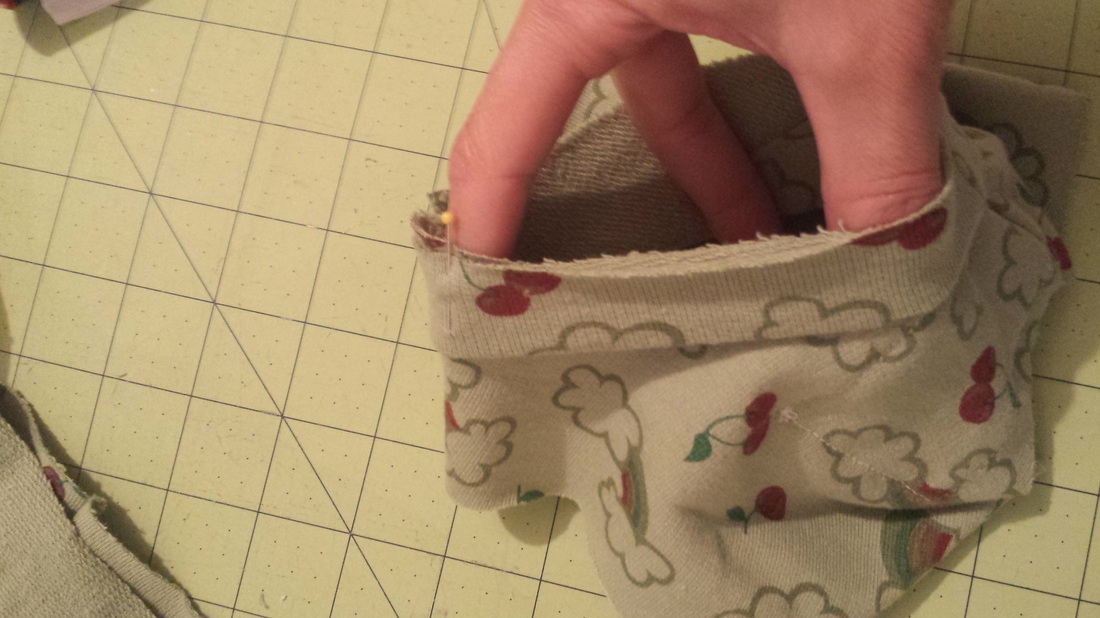
Next, take your leg band and fold it in half, right side (print side) facing out. Holding it open with your hand, stretch it over the leg opening of the underwear piece, which is right side out. Pin the leg band to the underwear piece, with all of the raw edges lying flat together. Sew along the edge, making sure to catch all three of the layers. When you turn it out, it should look like a cuff (see bottom photo). Repeat this with the other leg opening. You will do the same with the waistband. If you cut two shorter pieces, the steps will be identical to the leg bands, only you will obviously be sewing it to the top of the underwear. If you have one long piece, you will only need to fold it in half lengthwise and close the end with a seam. Sew it to the underwear in the same manner.  Oops! Soaker panel is a lot more crooked than I thought. Oh well! And that is it! You could topstitch around the waist and legs if you choose. If you do, make sure to use a long stitch length and looser tension so that your fabric won't pucker.
If you found this pattern/tutorial helpful, please pin, share and/or comment below. Thank you! Over the weekend, my not-quite-two-year-old daughter has decided to potty train herself. I didn't intend for her to be done with diapers so soon (a little bit sad about that, a little scared), but she has been showing signs for quite a while now. She has been holding it for longer periods of time and waking up dry from naps, has been telling us when she has a wet or soiled diaper, and then started to tell us before she went. We had pulled the potty seat out of storage weeks ago, and it was sitting in the bathroom. She would sit on it, and put her toys on there to pretend, but there was no big push to have her actually go in it. A few days ago, she was bare-bottomed and told me that she had to poop. She was pretty distressed over it, as she has been lately. She knows she has to go and acts confused. When we were out of the house last week, she went in her diaper, but was upset about it. This time, she knew she didn't have a diaper, and was frantic. I told her to sit on her potty and she did, but nothing happened. She got up and started to play, and I left the room. A few minutes later, I noticed she was in the kitchen, playing, and she had gone into the potty all on her own! She didn't even bother to tell me - haha. So now she is in undies and I am hoping to keep her out of diapers. Tomorrow will be quite interesting, as I have to work and I'm hoping she does well with the sitter. She has been great, no major accidents, even when we went out to run errands this afternoon! Because I am too cheap to spend money on Disney Princess underwear and have loads of fabric at home, I decided to instead make some for her. I traced a pair of underwear that are a little large on her and after a couple of tries, finally perfected a nice pattern to make some elastic-less undies. Yes! They fit great, are soft and stretchy, but don't have any elastic and so are simple and quick to sew. If you would like the pattern and free tutorial, I have linked it at the bottom of this page. I am pretty happy with how they turned out! 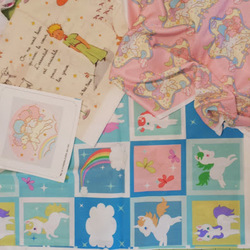 Spoonflower love! Spoonflower love! Spoonflower Mail!
After we paid a bill and went to the library, we came home and she took a nap. I checked my mail and lo and behold! My Spoonflower order had arrived! From top left, clockwise: Le Petit Prince Little Twin Stars little unicorns cheater quilt Kiki and Lala (small wall decal) I am so excited!!! All of them are my designs, except for the unicorns. It is so adorable and perfect, and I plan to make a bedspread for my daughter when we we put together her toddler bed. I am a huge fan of The Little Prince and hold that story very near and dear to my heart. I am not sure yet what to make with this fabric, but I am thinking of a pillow for my son, and/or modpodge it to a canvas for wall art. I will make a separate blog post for their room design; I am planning a muted gender-neutral celestial theme with stars, moons and fanciful creatures that inspire the imagination and give you sweet dreams. I have always been a HUGE Sanrio fan, and one of my favorite Sanrio characters was Little Twin Stars (Kiki and Lala). Now that I have children, I want to share my love of vintage Sanrio, and LTS are perfect for this room theme! Not only is it brother and sister, but they ride a unicorn Pegasus, live in the clouds and fish dangling off of stars. Can it even GET more perfect than that? Since all of the vintage Kiki and Lala fabric prints are suuuuper expensive and imported, I made one for personal use on Spoonflower. I ordered one as a wall decal, for myself. It is only a 5" x 5" square, but it is a good quality sticker. I wanted it to decorate my laptop, and it fits perfectly! My only problem is that my laptop is black and glossy. I think I need to buy some white contact paper and then put the sticker over that so that it doesn't clash as badly. That will have to be a later project! My other Sanrio Little Twin Stars design was ordered in their new Performance Pique fabric. It has a great stretch and is lightweight. I am not yet sure what to make with it, but it feels as if it would make a great swimsuit for my girl, with maybe some ruffles...! It could also be a really cute dress or skirt. If you have an idea of what to make with it, I welcome your comments below. Babywearing FTW! After her nap, I dropped Big Brother at a friend's house. This made Little Sister very upset, as she is used to going wherever he goes and doing whatever he does. And she knew the friend's house, so that made her very sad. To make up for it, I threw her on my back (works like a charm, every time) and walked to the store for a lollipop. It was 90 degrees and in full sun the whole time, but she was happy and chattering to me the whole time, so it was a great time. I used a Double Hammock Rebozo carry; I attempted to do a candy cane chest belt but my wrap wasn't long enough (only a size 3). It still ended up being a lot more comfortable than the Jordan Back Carry that I usually do, which puts a lot of pressure on my shoulders. So, overall, it was a great day. If you would like a pattern for the undies that I made for little girl, check back on my site within the next few days, or subscribe to my blog for notification. I will be posting it here. They are designed for girls' underwear, but you could use them for a boy if you do not want a fly opening. If you do want a fly opening, a great pattern for boys' underwear, check out my Sewing section and click on Boys Clothing. Have you successfully potty trained a child under 2? If so, I welcome your advice and suggestions! And if you have any good ideas of what I could make with this brand new fabric, please comment below! If you have a link to a pattern, that would be even better! Thanks, and hope you have a great week ahead of you! I have an unhealthy obsession with fairy tales. They are my weakness, and the more fantastical the story, the crazier I am over it. My book collection includes a collection of leather-bound Hans Christian Anderson, Grimm and Aesop books, and my love of books stemmed from holding these beautiful volumes in my hands and breathing in the wickedly delicious stories of self-sacrificing mermaids, child-eating witches and princes in disguise. I kept a dictionary near me to look up words like "tinder-box" and tried to convince my mom that my eyes were already bad, so what's the big deal about reading in the dark with a flashlight? Not surprisingly, my newest favorite TV series is ABC's Once Upon a Time. Since I don't have cable TV, I hadn't seen it until after Season 3 was finished airing. I watched the first season on Netflix and was hooked! Thankfully, the first two seasons are on Netflix, and then I used Hulu's free trial offer to watch the third. I am so in love with this show and cannot wait until season 4 starts! So for this blog post, I would like to do my own review of the show. However, there are going to be plenty of SPOILERS! You have been warned! 
OK, first of all, to prove my authenticity of induction into the OUAT fandom, I'd like to share my first ever YouTube music video. One of my favorite stories in the series is of Red Riding Hood. Her back story is heartbreaking, but very well done. In the video, I tried to compile the clips that showed her story and her strength of character as she transforms from a dangerously naive girl into a powerful and independent wolf. I made it mostly because of how much I love Red, but almost as equally because of how much I love this song. Every time I hear it, I think of Red Riding Hood, and now I have a video to go along with it! It's a little rough but I hope you enjoy it: One thing that I love about the show is the character development. For some, like Emma or Red, they find their courage and strength and learn to accept their place in the world (or really, both worlds!). For others, like Regina, Rumpelstiltskin and even Cora, we not only grow to empathize with their reasons for being the villain, but we see glimpses and even transformations of their true, good nature (although, the jury is still out with that Rumpel, who is a big fat liar!). Of course, sometimes the best part about any show is...the eye candy. I know, most of the fans out there are swooning over Hook. I like him all right, but I was always Team Neal. Don't tell my husband, but I am planning to name my next son Baelfire. 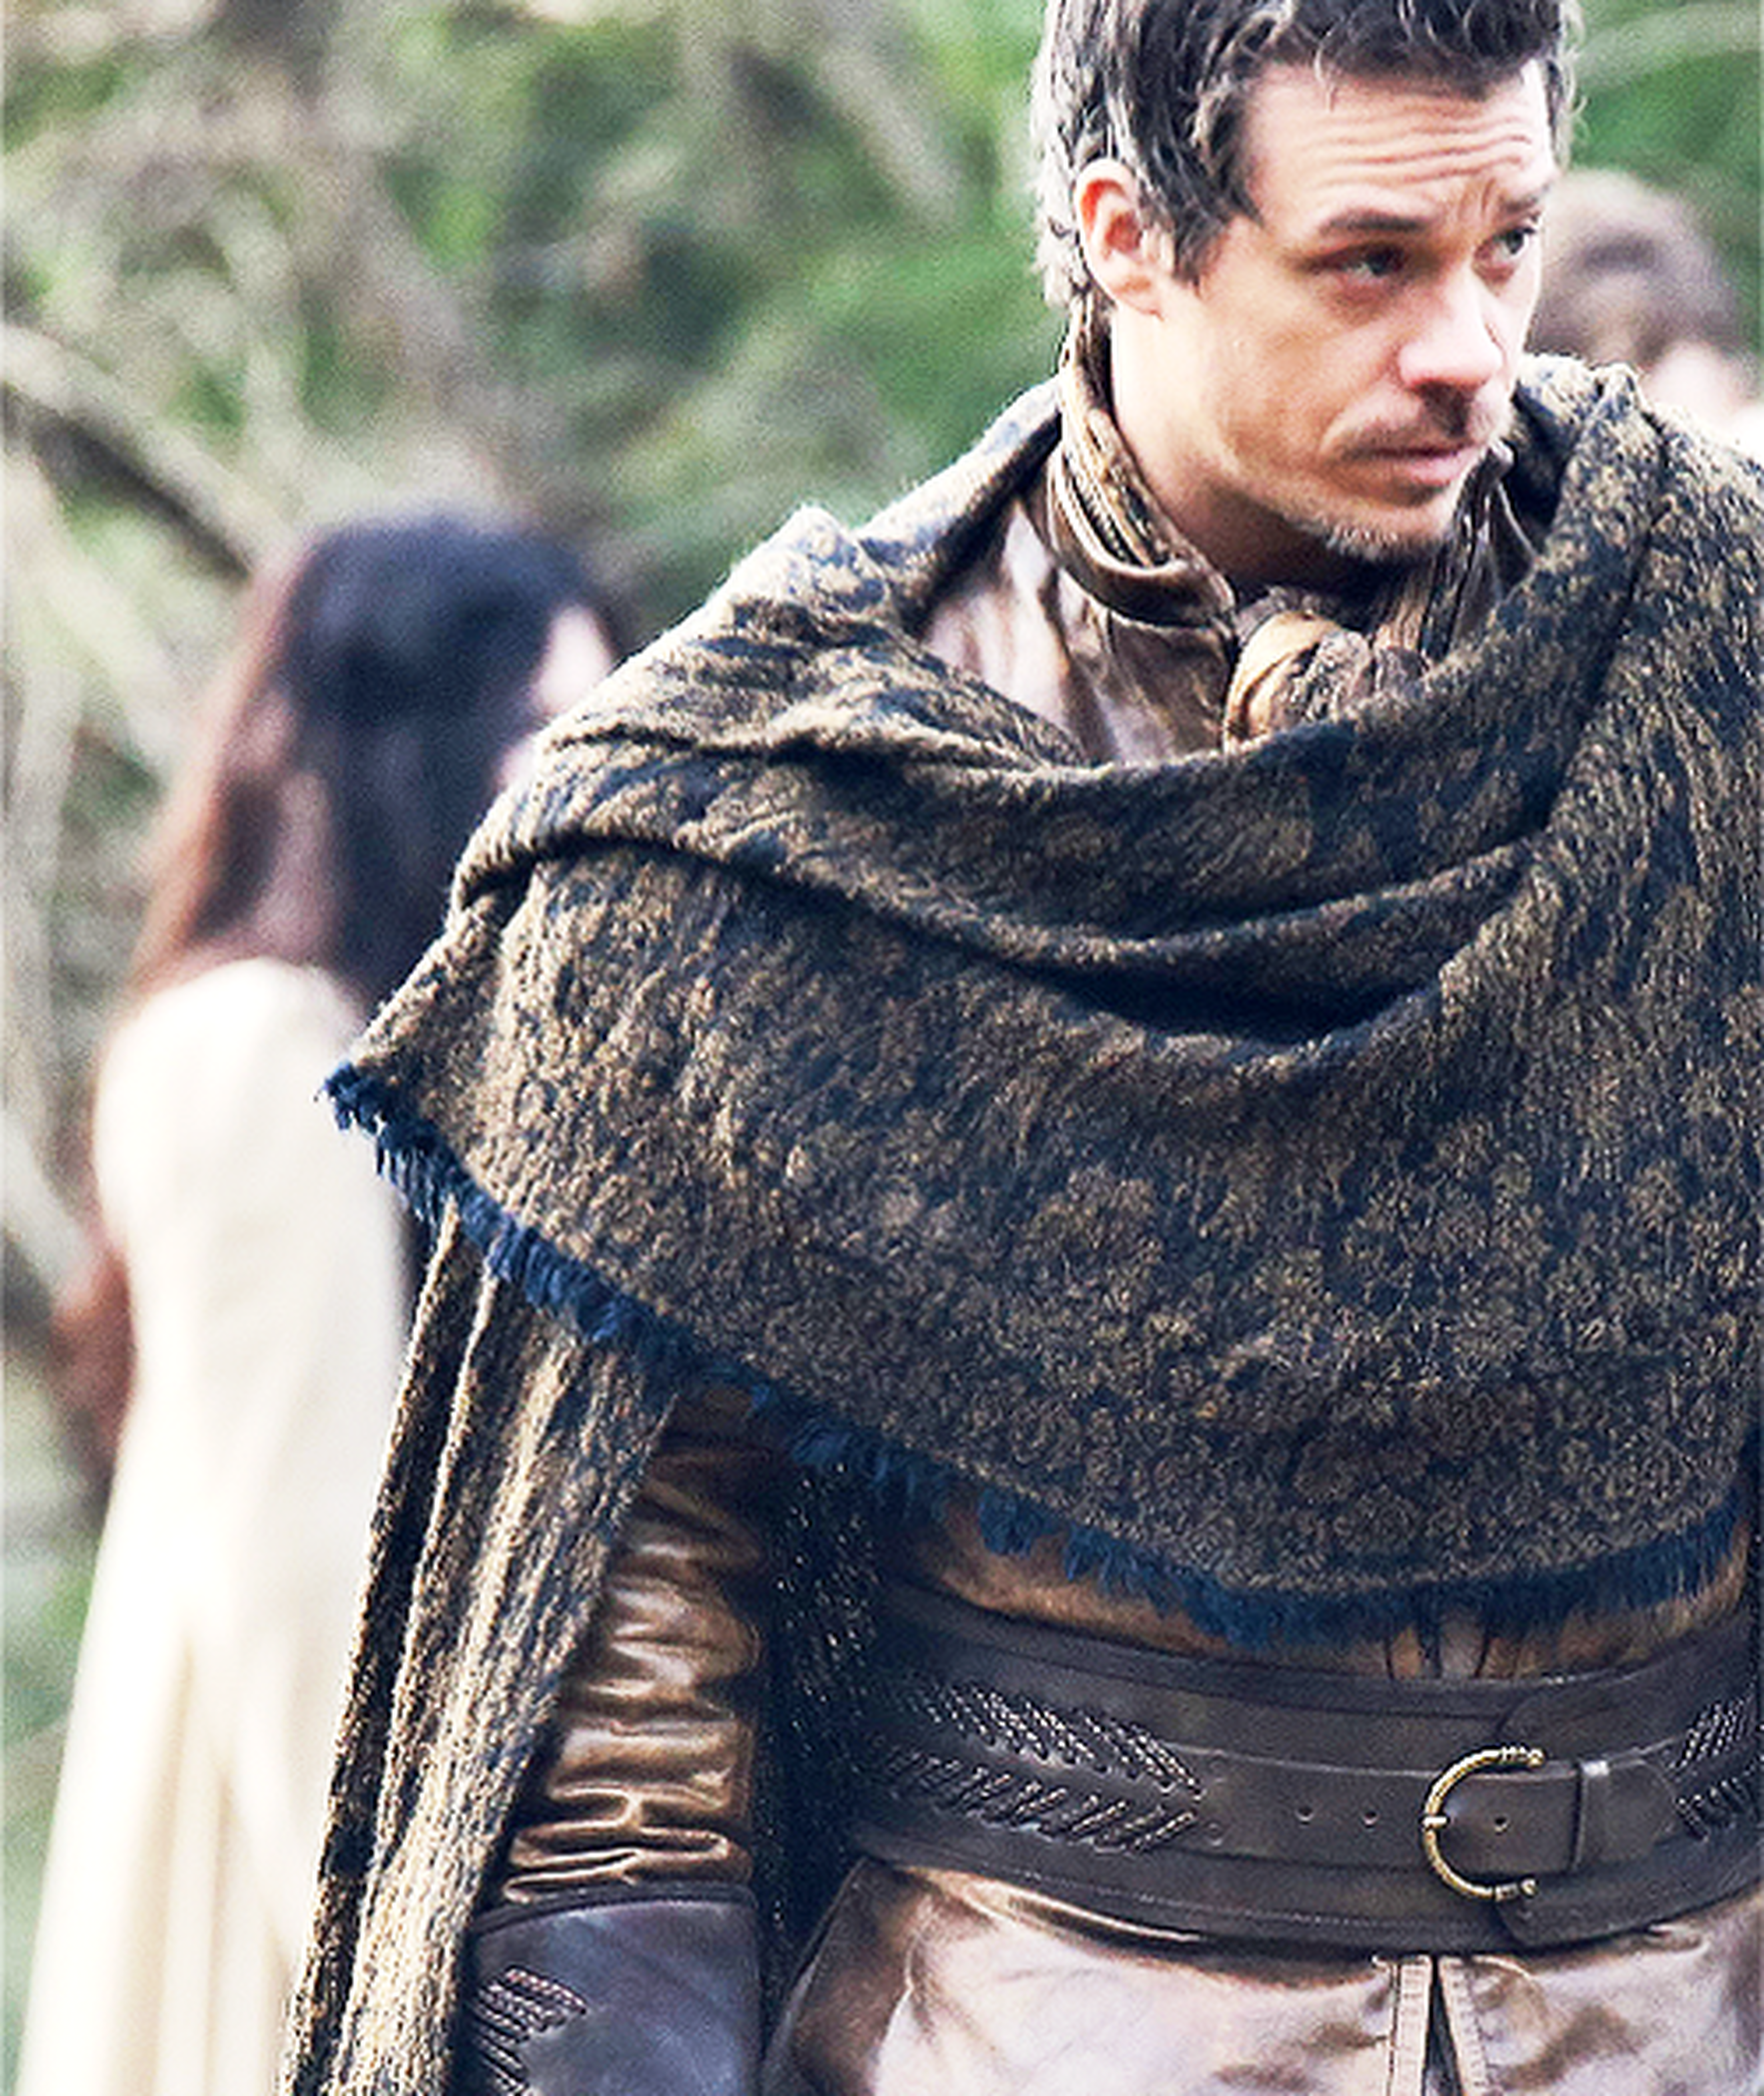
Yes, please!
A few of the other leading men that my fellow OUAT ladies like to ogle: 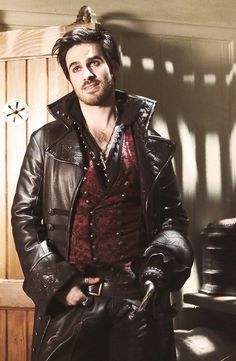  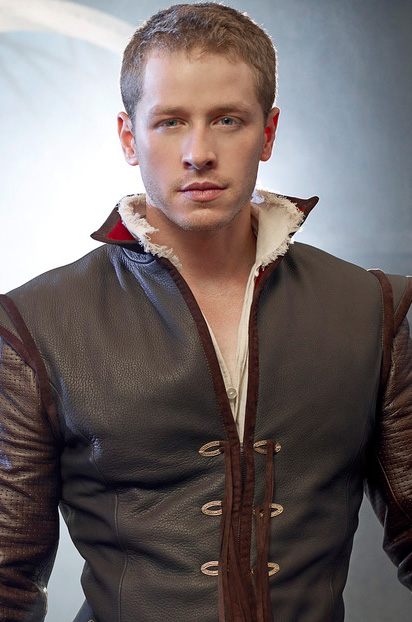 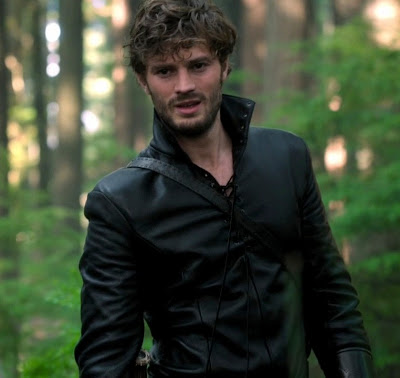  (Notice the lack of Rumpel...I think he is fine, but I am mad at him for lying to Belle.) OK, so this wasn't so much of a review as it was a droolfest, but I can't help it. There is just too much leather and "guyliner" for me to resist! As for the storyline and plot, well, I just think that overall, it is genius. The writers really work hard to intertwine the characters' stories just enough to make it believable and consistent (for the most part), leave cliffhangers in every episode and keep you feeling tortured over who to root for. Regina started out as THE evil villain, only to become someone who I will literally cry for if she doesn't get her Robin in Season 4 (speaking of which, who wants to join me in booing Emma for that brilliant stroke of genius in bringing Marian back from the past??! STUPID! And while we're at it, let's all take a moment to remember that Hook warned her not to, but didn't have the guts to do the job without Emma's permission, which officially makes him whipped! This is why Regina is the best, by the way). So....yeah. I am anxiously awaiting Season 4 because this is how I felt Season 3 ended and I am NOT ok with it: 
While we wait for Season 4, I found a really great way to get my OUAT fix and placate my withdrawal symptoms. Fan fic!!
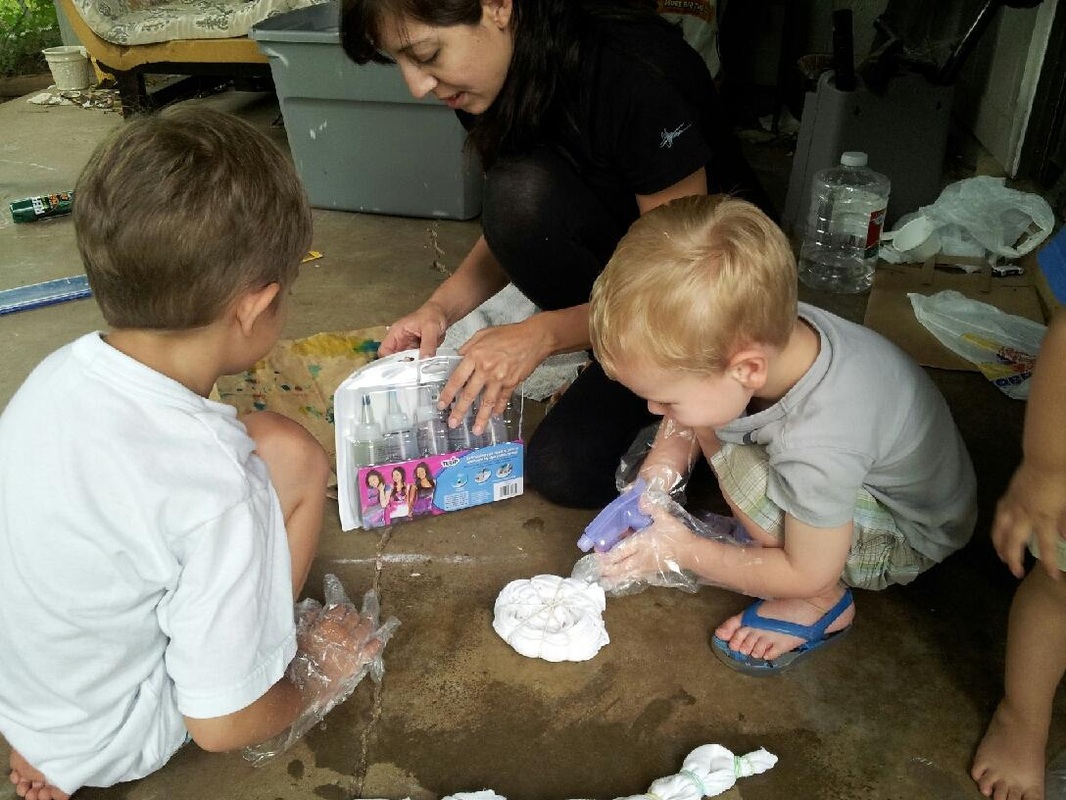
A good friend of mine writes her own fanfic story based on OUAT, and I love it! It's told from the perspective of Henry, a few years into the future. It's exactly what I need during these dark times...haha! Check it out, and click "Follow" to get notifications on new chapters when she adds it: The Cost of Happiness. That's all for now. If you are a Oncer and have anything to add, I welcome your comments! Some of my favorite conversations in the history of my life have been with my friends over this show! I'd love to hear from you. It is officially summer, which means...tie dye season! Yesterday, my friend brought over her Ergo and wanted to try an ice dye over its original color. It is a maroon Ergo with tan-colored inner and hood with little butterflies and bugs printed on the material. She wanted to liven it up a little, so she bought a few packets of Dylon and Tulip dyes from Joann. She also brought along her two boys (one aged 4 and the other only a few months old), so I brought out my last Tulip Tie-Dye kit that I bought on sale from Tuesday Morning, and we let the boys have fun tie-dyeing my dish towels (upcycled flat diapers and flour sack towels) and some white onesies. First, the Ergo was set up for an ice dye. I soaked it in a soda ash solution (1 cup of washing soda and filled a canning pot with enough water to immerse the Ergo). The BEFORE (Google image): 
Next, we put it in a plastic basket from Dollar Tree and suspended it on my drying rack, with a drip pan underneath. We covered the carrier with crushed ice and my friend sprinkled her dyes over the ice in random patterns. 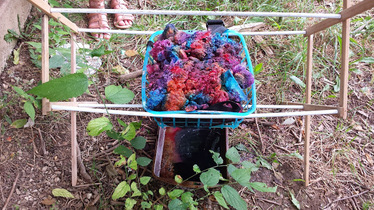
It was in the sun, so the ice melted fairly quickly. Some of the dye started drying out, so I added more ice. 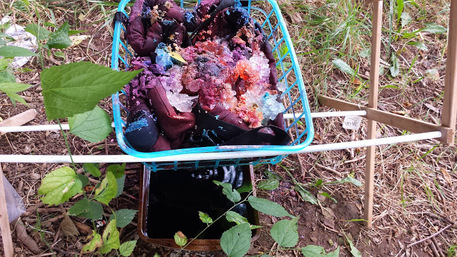
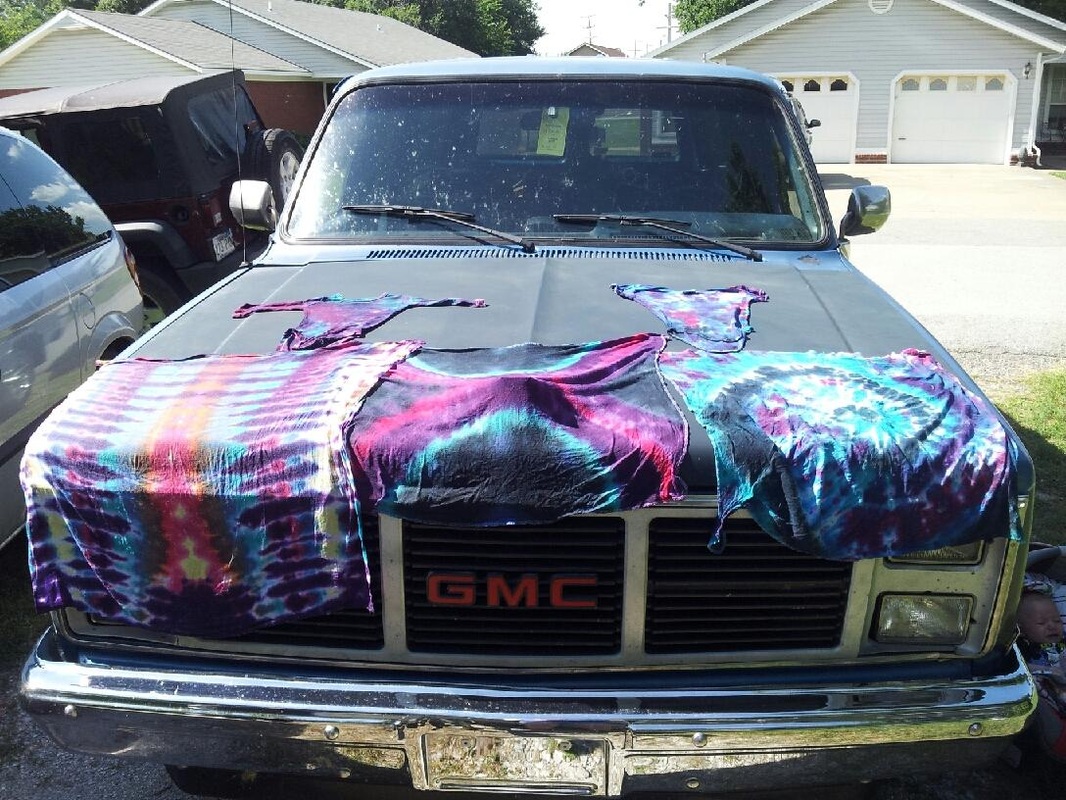
Halfway through, I discovered the infant insert and threw it underneath, in the drip pan (after I emptied it). As the ice melted, we helped the boys with some tie dyeing projects. We did a spiral and some other random folds. When they were done drying, I thought it would be more fun (and a little quicker) to rinse them off with the garden hose. It was so much fun! We all got drenched, which was great because it was one of the hottest days we have had so far this summer. As you can see, they turned out GREAT! Now, the Ergo had to stay here and sit for another 20 hours or so. Meanwhile, we mixed the dye for a wrap that I've been itching to dye for weeks. You can see the full tutorial and finished result here. The Ergo sat in the stand, melting and drying overnight. The next day after I got home from work, I immediately took it inside and rinsed it off. This is it when it was still wet (it lightened up a bit when it dried): 
Completely dried (with my baby girl's little foot): 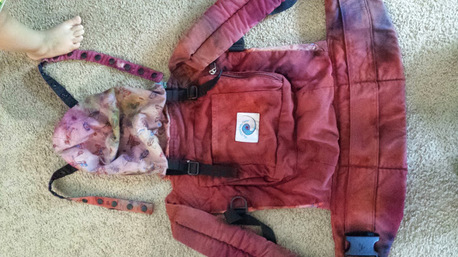
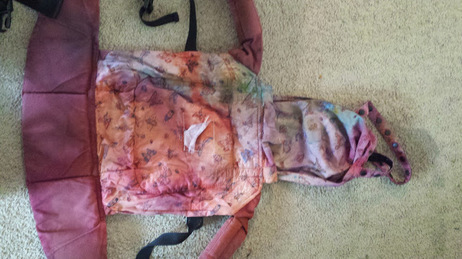
My friend says she wants to try a discharge technique to draw on some stars and swirls, which I think will look great! I also kind of think it looks a bit like a "zombie apocalypse" Ergo, which is right up her alley. ;)
We had a great day and the kids had a blast. I definitely recommend trying a tie dye party for your next playdate! Grab all the white cotton items you can find around the house, or maybe pick up some white tees at a thrift store and give them a makeover. My son loves wearing the t-shirt he tie-dyed last week all on his own. I think even just the fact that he gets to wear gloves is exciting enough for him! If you homeschool and/or do your own preschool activities with other families in your area, this could be a great learning opportunity. My son loves to watch the colors mix and we talk about the color wheel, and when he has friends over they have to share the bottles, follow directions and listen carefully, and then they get wet! It's a perfect summer school/play day. Have you ever hosted a tie-dye party? Share your experiences and creations below! I'll admit it: the term "unschooling" sounds pretty far out there in left field. Left field as in, you have GOT to be kidding me. I'm pretty sure that was my reaction the very first time I ever saw that term, which was in a forum that was not even related to homeschooling. Someone happened to mention it and did not explain it; therefore, I assumed that they were extremists (maybe even conspiracy theorists?) who believed the public school system to be an evil plot run by the government trying to brainwash our precious young. I always knew I wanted to try homeschooling my son, but I hadn't really spent much time thinking about it until my son started inching his way closer to preschool-age. I was intrigued by the term, though, and decided to research it further. I am eternally grateful that I did. I learned that the term is not an official name for the type of homeschooling that is also known as natural learning, or child-led learning. In fact, I also learned is that there is no "official" anything when it comes to unschooling methods. My first guide to this method of learning and educating was the book, The Unschooling Unmanual: 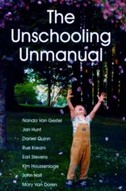 I rented it for free at my library, which has a few copies. I learned a great deal about how it works from family to family, and I realized that it is not a complete LACK of education, as its name tends to make one think. It actually began to look and sound like something I was already doing - creating learning opportunities in every day activities, and looking for practical applications. These families also mentioned something illuminating to me: focusing studies on subjects that were actually geared toward specific goals. Forcing a child to learn something that they are not interested in is not only wasted time, but it kills the joy of learning. Pondering on this is what led me to continue researching. Does my child need the structure of curriculum? My son, Zhane, was an early talker, slow with motor skills but quick to develop advanced communication skills. He was also very quick to pick up on things like numbers, letters, colors, etc. It never crossed my mind to put him into a daycare or program to learn "the basics"; by the time he was old enough for preschool, he had already known all of those things for years! Now, I promise that I didn't write this post to brag about my son (though he really is worth bragging about, because he is one smart kiddo). The point is that when I read the Unschooling Unmanual and then a few other books on the subject, what clicked for me was the fact that my kid actually DID learn all of this. Without workbooks. Without structured school time. Without structured parent-led play time. Without teachers. Sure, he was a toddler, and toddlers learn through play. But this was more than learning how to share or what the color blue looks like. This was real learning. Reading, writing, counting, adding, subtraction, fractions, measurements...the foundation for the stuff they tell you can only be taught by someone with teaching credentials. When we baked together, cleaned up our rooms or folded laundry, we did these things together and he would be sorting whites and colors, counting how many cups of flour and organizing his car collection. As I talked with more and more families (semi-locally and over the internet) who chose to unschool, I began to see that it didn't have to be something drastic or dramatic. My favorite aspect was the feeling that we could take life by the horns and squeeze the learning out of it with our kids. From the very beginning, my husband and I were joking about how our kid is going to be an adventurous little fellow and will have to hang on for the ride. Little did we know how true that would turn out to be! We have lived in 3 states and 7 houses since he was born and he is not even 5 yet! He has been on several long-distance road trips as an infant and toddler, his first cross-country airplane ride was when he was only a couple of months old and he has taken several since. We have always been a very active and outdoors-y couple, so yes, I have literally strapped him to my back. ;) But can you actually do that? Thinking about homeschooling, what made me feel the most hesitant - and maybe the most unqualified - was trying to duplicate the education system in my home. I grew up with several friends who were homeschooled, and I didn't notice a huge difference in how they learned the subjects I was learning in school. They had books, they sat at the kitchen table and read chapters, answered review questions, wrote essays, got graded, took tests. The thought of doing that with Zhane was all of a sudden overwhelming. What if he asks me a question I don't know? Am I patient enough? What if he gives me attitude and doesn't want to do the lesson? What do I do when he says he doesn't want to learn? When I learned about unschooling, all of those doubts disappeared. What if he asks me a question I don't know? We look up the answer, together. I love learning as much as he does! We don't have to worry about getting sidetracked and losing time, not turning in an assignment in time to some faceless online program. Am I patient enough? To be his mom, yes. His friend, yes. His fellow researcher, definitely. If either of us start to feel frustrated, we can take a break. For as long as we want. What if he doesn't want to do his lesson? WHAT LESSON!? What if he says he doesn't want to learn? Let's find something that you DO want to learn, and maybe go back to that later. Or not. The beauty of the freedom to learn One of my favorite quotes is this one, by Joyce Fetterol: "The goal is not to unschool. The goal is for children to learn joyfully." Most important to me is that my children love learning. The love of learning makes anything possible and is above all, the most important aspect of education. For me and my husband, our wish is to raise children to take responsibility of their learning, to focus on a goal (career) and work on attaining that goal. Their childhood and adolescence is short; this is the time they have to train for a career. Why do they spend 180 days a year, for 13 years, and come out with not much more than a piece of paper that qualifies you for an entry-level minimum wage job? Is it any wonder so many middle-aged adults return to school? Of course, the notion that a child can begin training for an adult career before they are adults is not a new one. In fact, it is the other way around. Historically, in just about every culture and society you can name, children or young adults were apprenticed to someone in the career that they or their parents selected. Ideally, they learned the trade and when they completed their apprenticeship, they were ready to perform that career on their own. I feel that although society and the economical structures have shifted, it is still possible and reasonable to expect a young adult to enter adulthood with more words on their resumes other than just diploma. I have many, many years before the subject of college will be applicable to our family, but if/when that day comes, I am confident that my son will rise to the challenge. I have seen several families with this upbringing whose children have thrived in the college setting and we able to complete their career goals at a much faster rate than their colleagues. Personally, I feel that this attitude toward life and learning is what will make the difference in the society of tomorrow. We live in a world that is constantly growing in technology that demands "the next big thing" faster than you can sell today's news. This explosion of knowledge has changed everything about how we live our day-to-day lives - except for our school system and curriculum. To quote Alvin Toffer, acclaimed writer, futurist and renowned business leader: "The illiterate of the 21st century will not be those who cannot read and write, but those who cannot learn, unlearn and relearn." So what do you do? Everything! Now that I know that this is the route we will be going with our children, I plan to make full use of our days together. We do a lot of activities in and out of the house, planned and spontaneous. I do make sure to have plenty of downtime, however, and I encourage the kids to play by themselves and explore. Fortunately, my kids are usually pretty good about doing that, and if they are dragging their feet and are wanting to be entertained, I start a project of my own. They can choose to join in or go off and play. They love to help me with dyeing projects, but get bored when I start sewing. I find that Pinterest is invaluable for finding ideas of things we can do together. Some of our favorite activities have been painting hot rocks with crayons, homemade playdough, homemade air-dry clay, watercolor techniques, fun science experiments and more. My Pinterest boards are full of fun ideas! You can check them out and repin as many as you like: http://www.pinterest.com/zhanesworld/ Hubby and I want to mix in several different learning techniques, including strewing, DIY Montessori-inspired games and maybe loose non-mandatory purchased curriculum to keep around the house, but the idea is to let Zhane lead the way and decide which ones look interesting. We can follow that theme and incorporate an almost limitless number of subjects within those genres. For example, at the moment, Zhane is very interested in his gymnastics class. He has been taking gym for almost a year and now is nearing the age where he will graduate from Tumble Bugs into the Boys Only class (squeal of excitement). We like to watch pro gymnasts together (movies, internet) and I mention how these were little boys once who had to practice, practice, practice, and they have to eat right. This leads to a discussion about nutrition and bone health, and we could have quickly pulled out the kid encyclopedia he has, and looked up more information on anatomy. That is just one example; a study of dinosaurs involves learning ancient geology (Earth's "ages"), paleontology (fossils), modern geology (minerals that form fossils), reading, crafts projects (making your own fossils, baking a dino cake or drawing and coloring), writing, math...depending on the age of your child, the possibilities are endless. Most of the time, our conversations are spontaneous and random. He asks a question and we look it up. That might lead to a longer discussion or not, but either way, he is learning. Ultimately, every family is different, and just as there are different types of public school families, there are many, many different types of homeschoolers. If you feel 100% confident in your choices and you commit 100% to them, your child's education will be a success. As a kid who was public schooled for most of my school-age years, I do not feel like I was disadvantaged at all, but I did wish for more. I am happy that my husband and I can offer that to our children, and I hope and pray that it can always be this enjoyable. -Astrid  Still trying to figure out how this blogging deal works...somehow, I ended up adding a separate blog to the Babywearing page. I will attempt to fix that later. In the meantime, you can follow/subscribe to my site using the FeedBurner link on the right-hand side of the page. It will notify you when I post something new!
I picked up two more packets of dye yesterday (hey, I had a coupon!), so as you can imagine, there will soon be more pics and posts about dyeing. This week, I added a post about babywearing with a short woven wrap, which you can read here. I will also be adding another DIY wrap tutorial with a grad dye (with my new packets!), and then a wrap to ring sling (RS) conversion. Besides wraps, I have been working on crayon rolls and colored pencil rolls for some friends of mine. We spend a lot of time studying the Bible during religious meetings, and we keep our children with us during these meetings. Bringing coloring books, stickers and small toys along is a big help, but I think my kids' crayon rolls are the most helpful thing we own for these occasions! I will be posting a tutorial on making those, as well, and possibly a link to purchase them if you would rather save the time and spend a few dollars on one already made. I also hope to add more info on cloth diapering, and because I love my hobbies too much to choose just one at a time, I will be combining two of them: diapers and dye. Stay tuned for that one! If you are afflicted with the incurable disease of fabric addiction as I am, you know that the worst thing in the world is when you find a print you like but then wish it came in another colorway, or that the background color wasn't quite so pink. Or, you have a great idea and want to make something subtle for your little boy and wish that you could find a My Little Pony fabric that's doesn't look like it was drowned in Pepto-Bismol.
The answer to your dreams is Spoonflower.com. This is my latest hobby/obsession, and though the price tag might give you a shock, in the world of fabric, the possibility of having your own design printed on fabric is truly priceless. Not only that, but you also have to option to offer your fabric for sale to Spoonflower customers, a site that millions of people browse and order from. For a full tutorial on designing a fabric on Spoonflower, click on Read More: 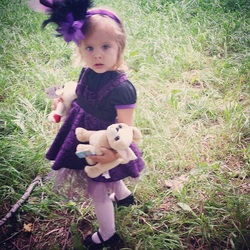 Here is my doll baby, my daughter Isla, going to her very first tea party. A friend hosted a Mad Hatter-themed afternoon tea and of course, I went overboard on her outfit (of course, I mean, really? An Alice themed tea party is just begging me to pull out all the stops). So naturally, that meant a fascinator and dress worthy of the Royal Wedding, and I scoff at the notion that any clothing store could EVER meet my high standards. Therefore, I marched straight into my local Joann Fabrics (after browsing some ideas on Pinterest) and grabbed up some supplies. An hour or so later, I finally had the complete outfit envisioned. I couldn't find the right fabric in the colors I wanted, so I picked a black and white damask and hand-dyed it at home using a packet of Dylon violet (also available at Joann's). After posting the completed outfit on one of my favorite Facebook groups, I decided to make the pattern and tutorial available, which meant making another one and actually taking pics and measurements this time. First of all, the pattern. Here is a link to the documents you will need to print out. At this time, I only have the pattern available in 24 months/2T size, but maybe I will one day figure out larger/smaller sizes. Link: The Mad Hatter Pinafore Pattern Not included in the link above is the pattern for a circle skirt. For that, you will need to follow the instructions posted below. Now, supplies. You will need:
 I will start by introducing myself, which will be close to a repeat of what I have on my "About" page.
Basically, I am a mother of two lovely little creatures; my son will be 5 in August and my daughter will be 2. They are my everything and the air I breathe, and I am in love with my life. I work outside the home part-time as a barista at a local bakery, and I also manage to maintain a very relaxed cloth diaper WAHM business from the home. I design fabric on Spoonflower, and I enjoy crafting, sewing, babywearing, dyeing, upcycling, reading and writing (I am working on a sci-fi fantasy novel that I hope to publish some day when I can manage to write more than a few sentences in between naps). On this site, I hope to add plenty of resources for other DIY-ers, my fellow Pinterest addicts and fabric hoarders, and my sister WAHMs who fight every day to finance their hobby by selling their handcrafted items. Whether you intend your creations to be for personal use or for profit, kudos to you for exploring your talents and making it happen! I hope to add some of the following types of blog posts in the near future:
In addition to the above, I would also love to include resources that I come across as I venture into the world of homeschooling. My family and I love the idea of natural learning and "unschooling", which is a form of interest-led, child-led learning. I will be adding more info on that later! Well, that it about it. I sure hope this blog post isn't too long and I've made some kind of weird blog faux pas. Haha! Thanks for reading! |
Meet & GreetHi! My name is Astrid and I am an unschooling, working mama of 3 with an intense need to design, craft and create. Follow me for ideas, tutorials, DIY projects, homeschooling resources and more. Archives
March 2017
Categories
All
|


 RSS Feed
