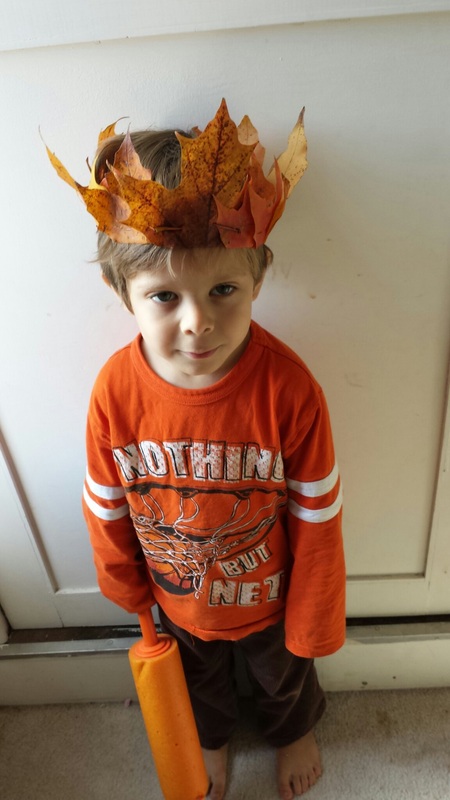
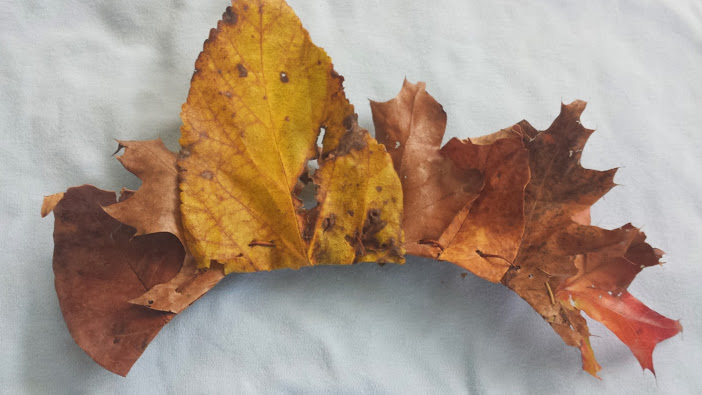
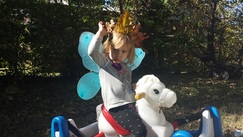
 Z's crown last year Autumn Leaf Crowns TutorialNo glue, no scissors, no tape, no mess! Just go outside! First, play a game with your kids gathering the leaves. You will need a pretty big pile, depending on how many crowns and how big their heads are, and the size of the leaves. Choose a variety of shapes and sizes, and try to pick out one special leaf to use for the front. I like to choose a taller, more colorful one for the front of the crown.Look for leaves that haven't dried out completely. If they are too crunchy, they will fall apart and will not be usable. Look for leaves that can bend in half without breaking. Some of the ones I used in these photos were a little too dry, but they still worked out. Now, take your leaves and remove the stems. Set these aside; do not throw away, as you will need them later! 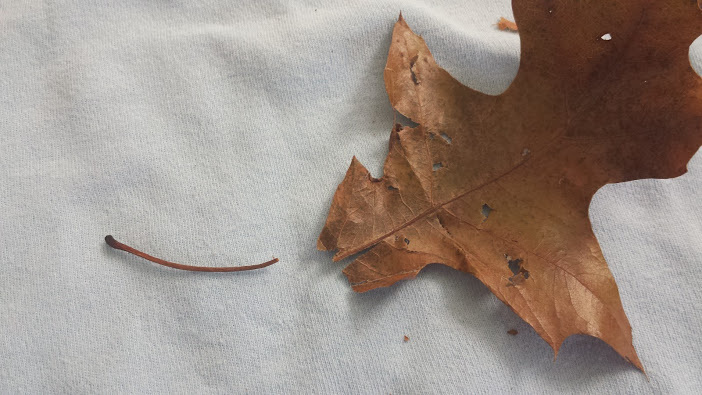 Next, you will bend the very bottom of the leaf behind itself. Bend only about 1/4th of the leaf, keeping the rest standing up tall. Take another leaf, do the same, and then layer it inside of the first leaf, kind of like putting together a taco! 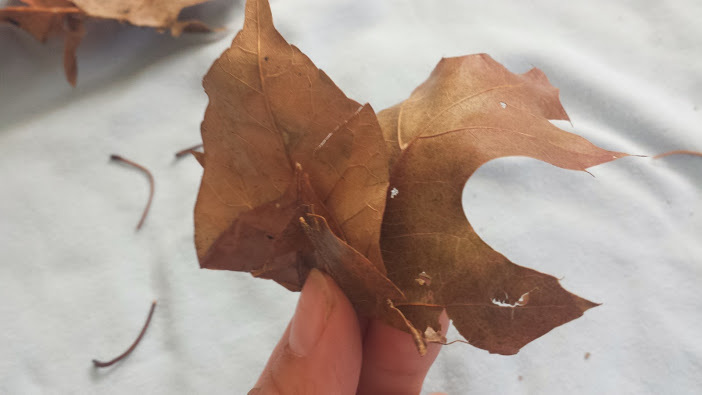 Two leaves layered together. The leaf on the left is resting inside of the other leaf's fold. Now, use the stem from the leaf to pierce through both layers of leaf. You are basically "sewing" the leaves together with the stem. From the back of the leaves, poke the stem through across what will be the front of the crown, then poke another hole to the back and leave it there. Continue these steps until you have a chain long enough to circle around your head.
 When you are done, close the circlet by "sewing" the two ends together with a stem, just as the rest of the crown is. 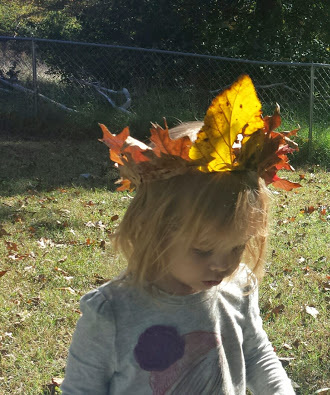 I hope I've inspired you to run outside and enjoy the beautiful weather and to do a craft with your little ones! Have fun, and thanks for reading!
0 Comments
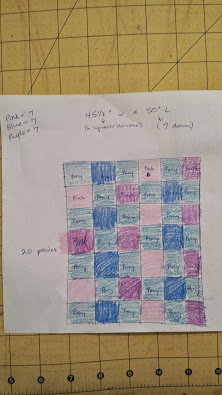
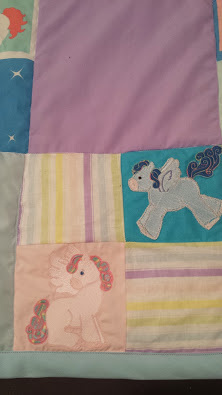
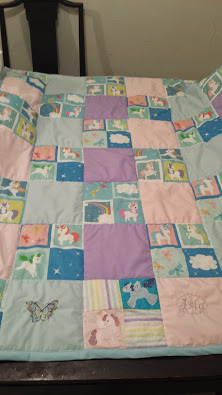 It's been a while since my last blog post, but things have been pretty hectic. I have, however, managed to find time to play around some more with my new fancy embroidery/sewing machine. Someone warned me that machine embroidery was addicting, and boy were they right! My embroidery machine is the Brother SE-400. It is a great beginner/hobbyist machine, and does everything I need and want in a sewing machine, plus has some great embroidery features as well. I've been having some fun browsing all of the free and cheap embroidery files on websites such as annthegran.com and embroiderydesigns.com. I can choose my design and upload it to my machine with a simple USB cable. It's been several years since my last attempt to make a quilt - and I was far from happy with how that one came out - but I was determined that it was time to try again. I had ordered a yard of cotton fabric from my favorite fabric site, Spoonflower.com, a couple of months ago. I wanted a crib-sized blanket for my daughter as she transitioned to a toddler bed, and she is crazy about ponies. Not only does Spoonflower have hundreds of adorable pony prints, but I had accumulated enough "Spoondollars" (store credit) as a designer from the sales I have made with my fabric designs. It was tough narrowing down the choices, but I finally settled on this adorable Little Unicorns Cheater Quilt design:  If that's not the cutest unicorn print on the internet, I'll eat my hat. Anyways, of course I just HAD to have it. I ordered a yard and since I knew it would not be large enough for the size blanket I wanted to make, I went to my local fabric store and picked up some solid cotton fabric in pink, blue and purple. Then I found a striped print in coordinating colors that matched perfectly. They were all on sale, so I didn't spend more than $10! I also found some crib-sized batting on sale for under $5, and then bought two packets of double-fold bias tape quilt binding for $1.50 apiece (coupons!). Once I was ready to start work on this blanket, I cut the unicorn print into squares. The print is already designed into faux quilt squares, so I didn't need to measure or use a ruler. This quilt took quite a bit of math, but with my trusty calculator and a quickly drawn outline of my design, I figured out how many squares of each color I would need, and how they would be laid out. I discovered that I was 1 square short of the unicorn design, but I improvised by downloading a $2.45 embroidery design from Etsy. It was a set of 10 different little Pegasus ponies and I embroidered them both and made my own quilt square for them, as you can see here:
I decided to make the bottom strip the only one with embroidery, so I added some personalized touches to the solid color blocks as well. For the blue square, I embroidered a butterfly with some rainbow thread; for the pink, I embroidered my daughter's name in silver and added an oval border; for the purple block, I used a free embroidery design from www.embroiderydesigns.com that says: You are Loved. 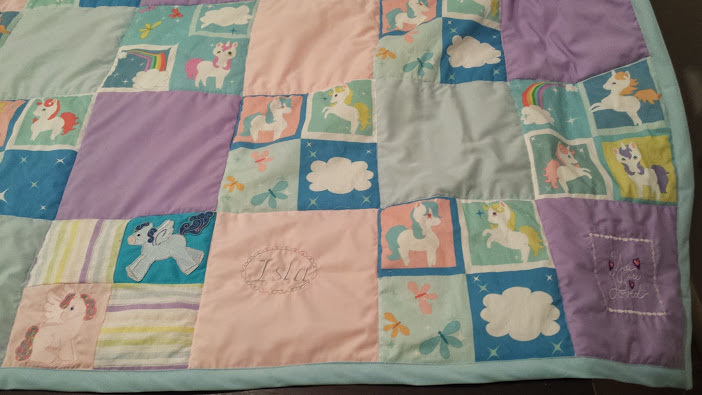 The next part was the easiest part: sewing the strips. I pinned the squares to one another horizontally, one strip at a time. Then I matched them up with the strip below (right sides together) until it was one solid piece. Next, I sandwiched the batting in between the bottom piece of fabric (right side down) and the top piece (right side up). I ended up being about 4" short on the vertical side of the quilt backing, so I had to improvise and sew two 2" strips of the striped fabric along both sides. I ended up loving how it turned out, because I turned the stripes horizontally: 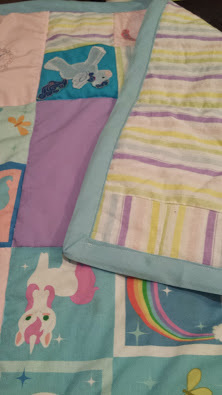 Next step was the actual "quilting". This is where you basically tack down the three layers together so that they won't shift or bunch up on the inside when you use and wash your blanket. For this quilt, I did the old "stitch in the ditch" method, where you sew a straight line alongside the seams that hold the squares together. To prep my fabric for this step, I pinned the layers all over with safety pins (lots and lots of safety pins!). I started from the middle of the quilt and worked my way outwards, toward the edges. I used my walking foot attachment to keep the layers straight, but that is optional and can be done with a standard sewing foot. Once that was finished, I could remove the pins and finish the quilt.
For this quilt, I finished with double-fold bias tape quilt binding. This binding is already ironed in half, so all you do to sew it on is to sandwich the edge of your fabric (making sure you catch all of the layers inside) and then sew a straight seam. It was a lot easier than I had imagined! I had to watch a couple of YouTube videos to learn how to fold the corners in, but t definitely wasn't as scary as I had expected. My previous experience with bias tape has been only with very small projects, and I was terrified of messing this up! In the end, I was very satisfied with how it came out. I think this is a great basic project for any intermediate seamstress/tailor and can be an inexpensive baby gift if you find a great deal on the fabric and batting, like I did. Quilts are always a useful gift, and there's hardly a more personal, loving handmade gift more wonderful than a quilt. Have you ever attempted a quilt? Share your successes (and fails too, if you are not too embarrassed - we all had to start somewhere, right?)! |
Meet & GreetHi! My name is Astrid and I am an unschooling, working mama of 3 with an intense need to design, craft and create. Follow me for ideas, tutorials, DIY projects, homeschooling resources and more. Archives
March 2017
Categories
All
|
 RSS Feed
