|
Grad dye, ombre - whatever you want to call it - it's all the rage nowadays. Search for "ombre" on Pinterest and you will find everything from hair to nails, home decor and fashion. In the world of dyeing, it's usually referred to as "dip-dyeing" or as a grad (graduated) dye. The idea is that you have a darker color that fades into white, or into another color. Last weekend, I had the privilege of converting another innocent person to the dark side. By dark side, I mean Addictive World of Fabric Dyeing. I was visiting a friend and she was looking for a good carrier for a toddler. It was my first time doing a grad dye, and my first time seeing a glue resist that actually worked! The finished product was great, and I would post a photo but the "after" pictures include my friend and her kids and I respect their right to privacy. So for this tutorial, I will show you the grad dye that I did this week, for a long piece of fabric that I was given. It is some type of linen/cotton blend and had a 60" width, which means that it was wide enough to cut into TWO wraps! I am saving that one for my friend. For starters, here is a list of what you will need for your DIY grad dye wrap:
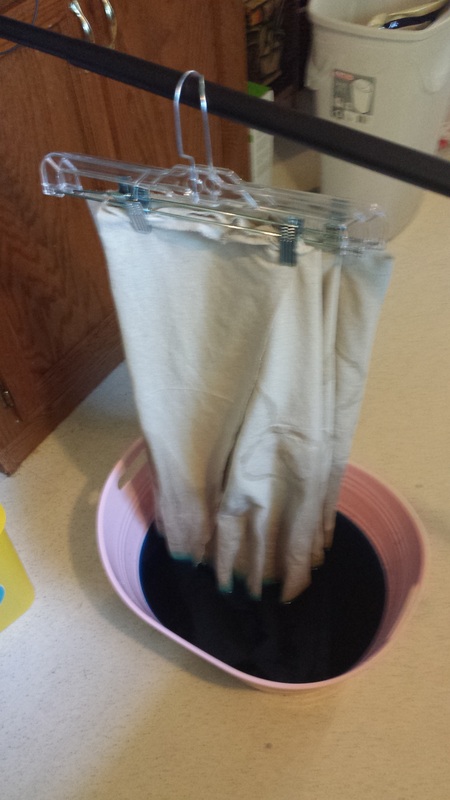
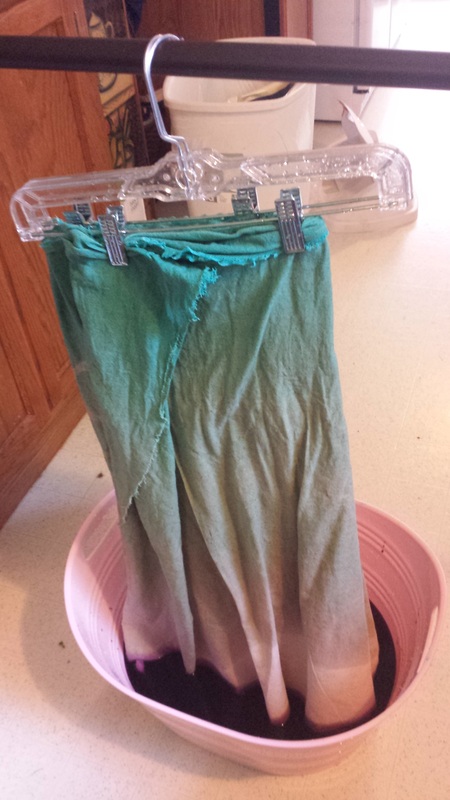
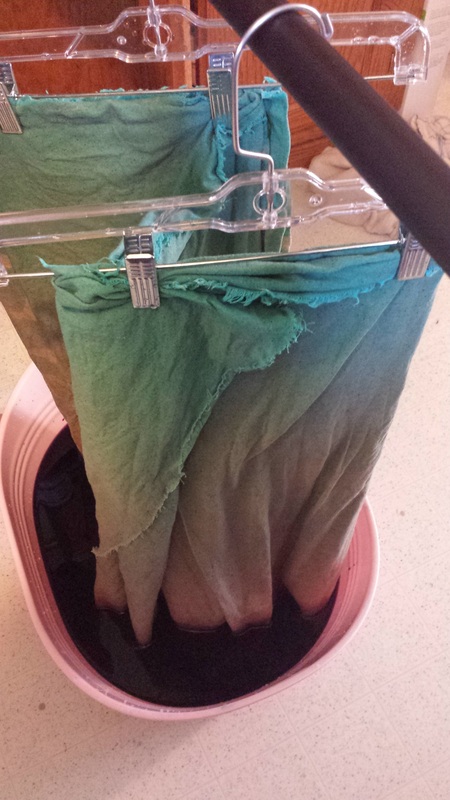
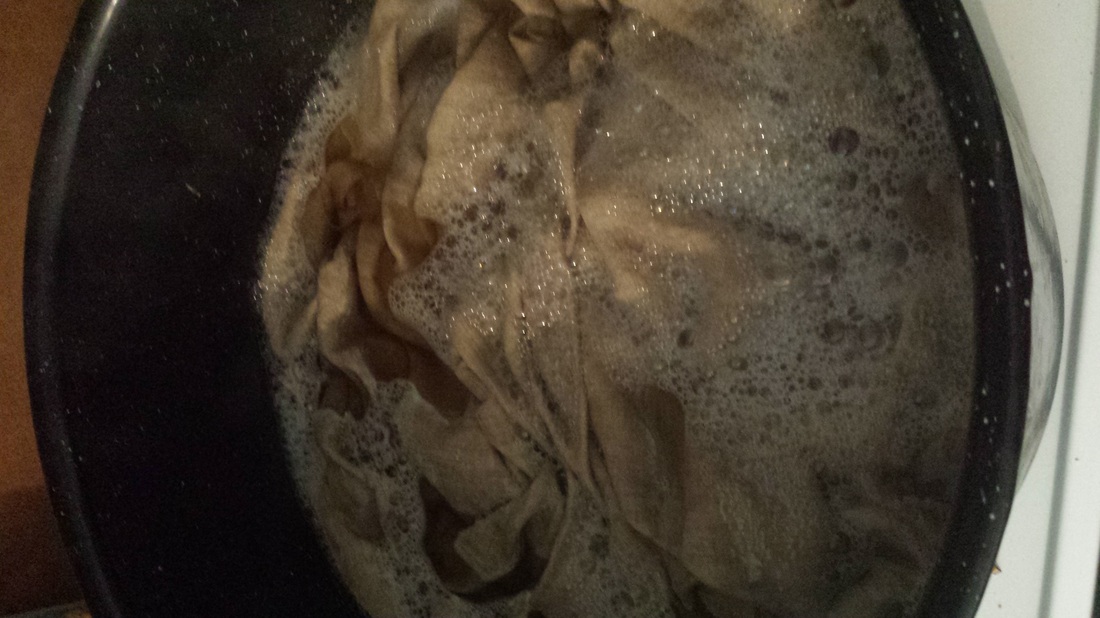
I had some black and dome pink dye leftover from my galaxy wrap, so I decided to try a grad dye using both. I did have to pick up an extra packet of each color, so I had two 1.75 oz Dylon Velvet Black, 1 Tulip fuchsia and 1 Dylon Flamingo Pink. 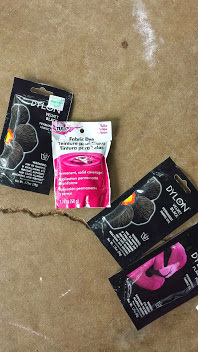 It's totally OK to mix brands, as long as they are fiber reactive dyes, which these are. You can find these dyes locally, at Joann Fabrics, Hobby Lobby or Walmart, but steer clear of Rit brand dyes for baby/kid items. Rit dye is not fiber reactive, which means that it does not bond with the fibers completely. Because of this, if your baby sucks on the fabric, the dyes could bleed and be ingested. This also means that your colors will fade a lot quicker over time. I've seen a friend dye osnaburg with Rit and I was shocked at how faded it looked after the inital dye bath. :( Anyway, my wrap ended up 138 inches long, 28" wide after washing, scouring and hemming. This is a few inches longer than a standard size 3 wrap. I did not taper this wrap and so far, I love it. Tapers are pretty on certain carries, but most often I just find them more annoying than helpful. To start, make sure to wash and dry your fabric at least once or twice to allow it to shrink. Shrinking is a good thing, as it will tighten the weave. Next, you will want to scour your fabric. To do this, select a large pot (I use a canning pot that I found at a thrift store) and fill it with enough water to submerge your fabric. For my 3.5 yards of fabric, I added a cup of washing soda (in the laundry detergent aisle of Walmart and most grocery stores; it looks like this) and about a tablespoon of blue Dawn dish detergent. I added the fabric and turned on the heat. I let it boil for about 30 minutes, checking on it often to poke at it and stir it a little. When it was finished, I drained the water, which was a nasty brown-yellow color, and rinsed. After it has been thoroughly rinsed, fill your pot back up with water and another cup of washing soda. Soak your fabric in this for at least 30 minutes. This will give you brighter, more vibrant colors and is especially important when doing a grad dye where you are diluting the dye. Wring it out when it is done but do not rinse. It is now ready to dye, but in my case, I hung it out to dry (it is generally advised not to put fabric soaked in soda ash in an electric dryer, as it could be combustible), and then hemmed it when it was dry. I did this because I knew that I was not going to be able to dye it that day. I didn't end up getting back to this project for almost a week. When I was ready to dye, I was planning to just re-dampen it with water, but decided to just make a smaller batch of washing soda and water solution and wrung it out so that it was wet but not dripping. You could, instead, hem it last. It's entirely up to you what order you want to do it in. The only advice I can give is that if you do it as I did, avoid spritzing it with water to dampen it, as it could make some spots that show up afterward. Now for the fun part! Mix your dye and prepare the dye bath. To do this, I had a separate container and added one packet of dye and 4 cups warm water, as directed on the package. I mixed it until it was dissolved. I had filled my gallon water jug with water and added it to the rubbermaid tote that I was using, and added 1/4 cup salt and 1 cup washing soda. I mixed those together before adding the dye. I then mixed the second packet of fuchsia in the same way, and added it to the dye bath. I folded my fabric in half lengthwise, then did an accordion fold and attached the top of the fabric to the hanger clips. To do an accordion fold, grab the ends that are folded in half and gently fold the fabric back and forth, making pleats in the fabric that are the width of your hanger clips. It should look something like this illustration:  Place your rod high enough so that only the very bottom of your fabric will be resting in the dye at the level it is right now. I did not have anywhere to rest my rod where it would be high enough, so I just draped the hangers over a broomstick resting on top of the rubbermaid bucket itself, and made sure to watch it the entire time so that I could be sure that it didn't drop into the bucket. 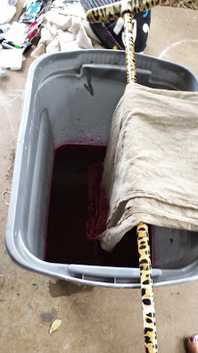 I set the timer for 5 minutes and let it sit. Meanwhile, I filled up my water jug with another gallon of water. When the 5 minutes were up, I SLOWLY added the gallon to the dye bath. Don't let the water splash, or it could make droplets on your fabric. Now I set the timer for 4 minutes, and it was 4 minutes for every level thereafter. Anything more than 3-4 minutes could cause distinct lines instead of the gradual fade that you want. Every time you add a gallon of water, you can add more soda ash and salt. I forgot this step (oops) and it turned out great, so this step is optional. After the fourth time adding water, I decided not to dilute the dye anymore, but instead, lower the fabric into the dye. At this point, the bottom rail of my wrap has been soaking in the dye for 28 minutes and had a stronger concentration of dye for the first 5. Now I was at the middle and lowered the fabric on the rod. If you are using a tension rod in the shower, you could just lower the rod against the wall. Or, if you have a pulley system set up, you would loosen the rope. I did this step twice, and then transferred the fabric to my bathtub. While it is still on the hangers, I like to hang it up in my shower for a few hours to allow it to batch. I don't worry about staining my tub; it all comes out with bleach and a sponge. When that is done, I rinsed in cold water until the water is clear. Be careful not to rinse the untouched side of the fabric, so as not to rinse out the soda ash soak. After doing this, I then folded the fabric again in the same accordion fold, only now the pink end was clipped to the hangers. Time to dye the other side! I repeat the exact steps with the other rail, hang it up to batch, then rinse with cold water until the water is clear (either by hand or in the washing machine). Next, I rinse my wrap on hot. You should be able to do just a couple of hot water wash cycles in your washing machine, just to get rid of any more excess dye, but if you have blue Dawn dish soap or Synthropol, you will want to add a small amount to the first hot rinse to help remove excess dye. If you have not already hemmed it, that will be your final step before you can start wrapping! I was very happy with how mine turned out, and it was surprisingly easy. The hardest and more laborious step is the rinsing if you don't choose to use your washing machine, but if you have a hose and maybe a drying rack, you could try rinsing it out that way! As usual, I welcome any comments, questions or suggestions. If you find this tutorial useful and make your own creation, feel free to post it below as well! -Astrid
7 Comments
Moriah
1/7/2015 01:55:42 am
This is beautiful! I've had my DIY wrap sitting around for weeks and I'm finally about to do a brown-to-yellow grad dye. I'm psyched.
Cece
5/19/2015 04:08:22 am
Hi, this is so helpful.. Thank you! .. I was wondering, have u done grad dye with multiple colors? Can that be done? Tia 😊
Astrid
5/19/2015 11:44:15 pm
Hi! Yes, I've done a three-colored grad before. To do that it depends on the colors you want; if you wanted, say, blue, purple and pink, you could either do all three colors separately (by dyeing, rinsing and refolding for each color), or you could dip on end in blue, do the pink end next, and let the pink and blue overlap in the middle while you are dipping. Alternatively, you could do the blue rail, refold and dye the rest of the fabric pink, then dip the pink hem in the blue dye to make it purple, leaving the pink in the middle. Hope that makes sense! If you are doubtful, try practicing on a smaller piece of fabric, such as a flour sack towel or t-shirt.
daisha
5/31/2015 06:59:08 pm
What kind of salt do you recommend?
Astrid Turner
6/1/2015 01:36:31 am
Non-iodized salt works best, or pickling salt. Any type of salt other than mineral salt will work, and if all you can get is iodized, you can use that.
Niki
3/31/2016 05:09:38 pm
I don't think I understand the folding correctly. You fold it in half lengthwise means short end to short end or long end to long end? I'm sorry I'm having a blonde moment. Thanks!
Astrid Turner
4/2/2016 11:35:44 pm
No problem! If you want the stripes to be horizontal, you fold it short end to short end. You will have the rails on opposite ends at all times. Leave a Reply. |
Archives
August 2015
Past ProjectsCategories |

 RSS Feed
