 DIY ice dyed shorty size 3 wrap DIY ice dyed shorty size 3 wrap In this tutorial, I am dyeing fabric that I finished to create a size 3 wrap. Along the way, I will be going over what types of fabrics you can choose from to safely make your own DIY wrap. Woven wraps are great for carrying babes and toddlers of all sizes and ages, but they can get pretty pricey. My size 7 Ellvill Zara tri-green costs over $200 retail (best baby shower present EVER!). You can, however find plenty of other woven wraps for around $100 or less, and you can check my Resources page for some tips on getting wraps and carriers. For my DIYers, there are lots of options; the possibilities are endless! Linen and cotton are breathable fabrics that are lightweight but still strong enough to hold 45+ lbs of weight, easily. I can back carry my 4 (almost 5) year-old in this wrap. A size 3 wrap is a good length for me; if you are a plus sized mama, you might want to try a size up, maybe a size 4 or 5. If you are browsing a fabric store, you will want to head to the utility fabrics section. You should be looking at a wall of plain and/or natural colored fabrics such as muslin, linen, etc. When it comes to choosing your fabric for something you will be entrusting your child's safety with, you want to make sure you choose the right kind. Here are some tried and true options: Fabrics that are safe for wrapping are between 5.3 - 7oz and are:
Fabrics that are not safe for wrapping:
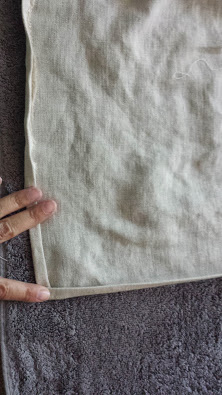
Once you have picked out your fabric, you will need to know how much to buy. Here is the handy dandy wrap size chart: size 2 - 2.7 meters = 8.86 feet = 102.36 inches (2.84 yards) size 3 - 3.1 meters = 10.17 feet = 122.05 inches (3.39 yards) size 4 - 3.6 meters = 11.81 feet = 141.73 inches (3.93 yards) size 5 - 4.2 meters = 13.78 feet = 165 inches (4.58 yards) size 6 - 4.6 meters = 15.09 feet = 181.10 inches (5.03 yards) size 7 - 5.2 meters = 17.06 feet = 204.72 inches (5.68 yards) size 8 – 5.60 meters = 18.37 feet = 220.47 inches (6.12 yards) (http://paxbaby.com/paxbabys-woven-wrap-guide/) Your wrap can be anywhere between 28" - 32" wide, depending on preference. I cut mine at 30" and hem both side about 1/2" each, which gives me a 29" width. Click on "Read More" for some scouring, hemming and ice dyeing instructions: The fabric that I had on hand for this project was a linen/cotton blend. It was actually given to me by a relative and fellow fabric hoarder, who was destashing and thought I could use it. I was thrilled when I looked through the box and saw it, and as I unrolled it I saw just how large of a piece it was. It was literally the perfect length for a size 3 shorty wrap. It was 70" wide, which meant that I could split it in half lengthwise and make TWO wraps! Because I didn't know exactly the fiber content of this fabric, I needed to perform a couple of tests before I got too excited. First, I did a dye test. I cut out a small square and sat it in some leftover dye that I had from another project, and let it sit for an hour or so. When I rinsed it, I confirmed that it was, indeed, a cotton fabric and had taken the green dye very well. Next, I did a burn test. Cotton burns very differently from polyester, so I took a tin plate from my stove burner, some tweezers and matches. I held the fabric with the tweezers and hovered it over a burning match. Cotton is flammable, so if the fabric is cotton it will catch fire and burn, whereas polyester and other synthetic materials will either melt or repel. Synthetics will also give off a chemical smell and a dark plume as it burns. The fabric I had caught fire and left black ashes, and there was no harsh chemical smell, which confirmed that it was a cotton blend. The fabric was a little on the thin side, but after I washed it a couple of times and scoured it, I could see that the weave had tightened up a bit as the fabric shrank slightly. As you can see, the fabric was quite obviously a lot thinner than the popular osnaburg is, but it is holding up very well after multiple washes and regular back and hip carries. It is more "grabby" than the osnaburg, but it still needs some breaking in. 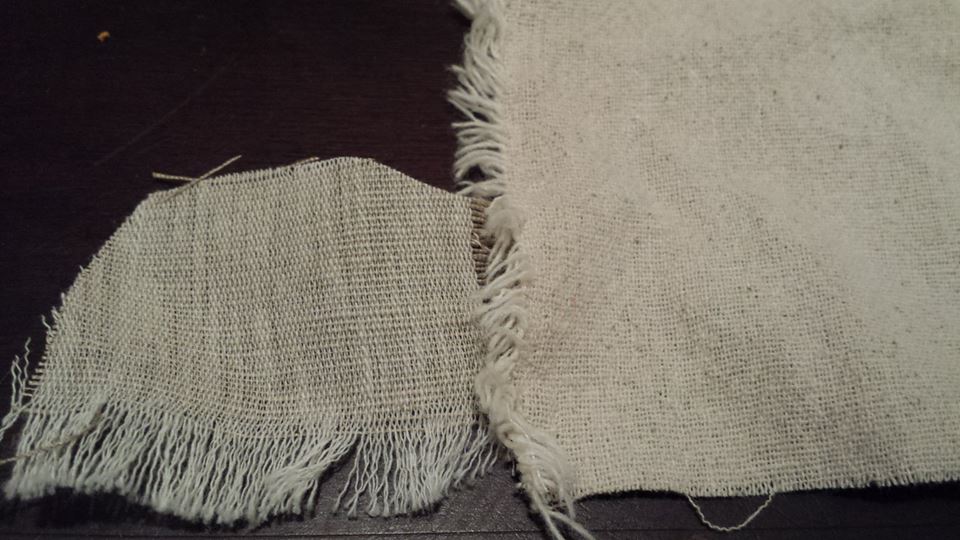 Linen/cotton blend on the left, osnaburg on the right. After washing and drying it twice, with and without detergent on hot cycles, it was time to scour. I placed my fabric in a large canning pot that I use for dyeing, and filled it with enough water to submerge the fabric. I added a cup of washing soda and a tablespoon of blue Dawn dish detergent. I let it come to a boil, then let it boil for about 30 minutes. After this, I rinsed it out. I found the easiest way to do this was to place it in my washing machine on the rinse & spin cycle. While it was rinsing, I emptied the dirty scouring water (it was dark brown, yuck!) and filled the pot back up with water. This time I only added one cup of washing soda. I placed my fabric in the pot and let it soak in this soda ash/washing soda solution for a few hours. The longer it soaks, the better. Soda ash assists the dye in penetrating the fibers, provided you will be using fiber reactive dyes, such as Tulip, Dylon, Dharma, Procion, etc. (Note: Rit fabric dye is not a fiber reactive dye, and will not penetrate natural fibers the way these other dyes will). After soaking, DO NOT RINSE. Wring it out, or throw it into your washer for a spin cycle. Now, I like to hem my fabric before dyeing, but you can do it afterwards, if you like. If you want to hem it now, you will need to dry your fabric. I prefer to let it line dry, outside in the sun. Soda ash/washing soda is apparently a combustible, and I have read not to dry it in an electric dryer, though I have done it on low heat before without any problems. To hem, you can do it a couple of different ways. If you own a serger, you could do a rolled hem all the way around. This is a pretty easy and quick way to do it, but if you are like me and only know how to do basic overlock serged edges (I need to do something about that, like take a class or something!), you can find some tutorials on doing a rolled hem by searching YouTube. You can also check your serger's manual. I do like using my serger, but for this wrap, I did a basic hem that looks like this: 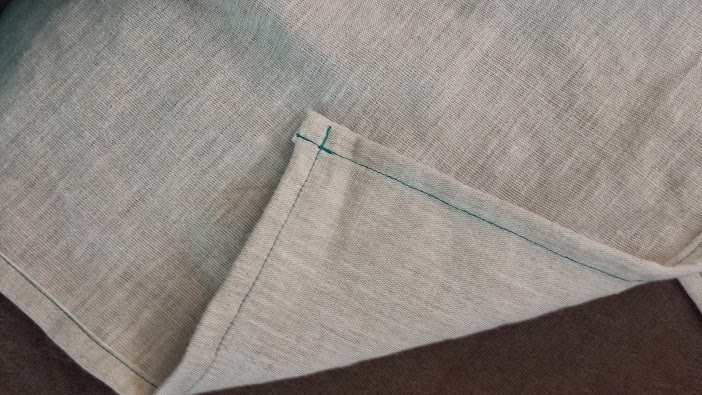 Basic hem with sewing machine To do this type of hem, you only need an iron and a basic sewing machine (and thread). Fold your edge over once, about 1/4". Press it with the iron (set on your highest hot/cotton setting). Once you have pressed the whole length of the wrap, go back and fold it over again, another 1/4". Stitch along the inside of the fold. (Note: most threads are polyester, which is fine, but keep in mind that it will not take on the color of your wrap if you are dyeing this. Only cotton thread is dyeable for this project.) If you want tapered edges on your wrap, measure and cut these beforehand. Otherwise, leave it as is.
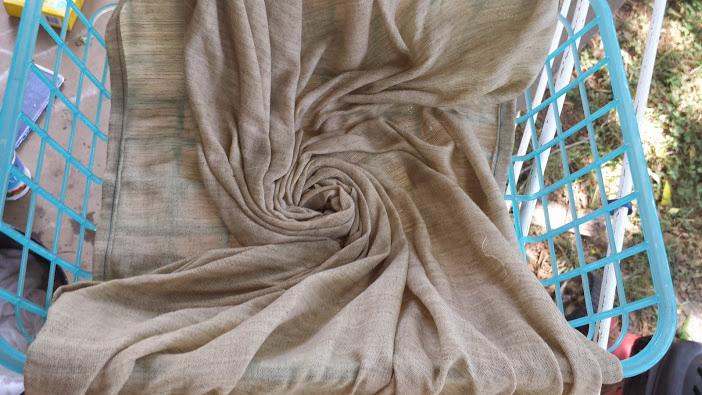
Now you are ready to dye. Since mine is now dry, I like to dampen it to begin dyeing. You can dye dry fabric, but the water tends to bead off the fabric and I prefer it damp. I still had some of the soda ash solution leftover in the pot, so I dunked my fabric in it and wrung it dry. You could use a spray bottle if you prefer to do that. Next comes the creative part. You can do whatever you like to your fabric: scrunch, fold, swirl/spiral, tie, even braid it. For this project, I started with a spiral in the middle. This would serve as a middle marker for my wrap, which would assist me in wrapping certain carries. After making a spiral, I scrunched the remaining fabric randomly, though I did pinch a few mini spirals in between.
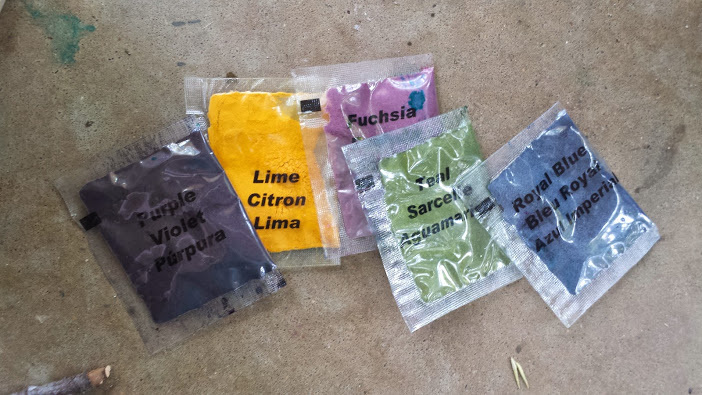
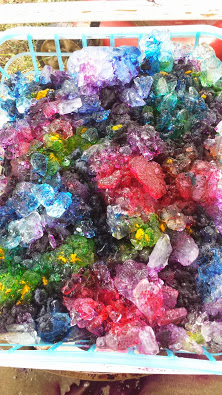
For an ice dye, you need to make sure your fabric is suspended over a drip tray. I found this plastic basket at Dollar Tree for $1 and it fits perfectly between the rails of my drying rack. As the ice melts, it will drip into the tray. If you have a plastic baby gate that you no longer use, a screen or any type of basket you can suspend over a bucket, that will work as well. Now, you will get your bag of ice (or snow, if you are doing this during the winter) and pile it on top of your fabric. Take your packets of dye and begin emptying them on top of the ice. You can use random designs, stripes, swirls or whatever pattern you like. I personally like random, so I tried to spread the colors out as much as possible. I was using leftover dye from a Tulip kit, and these were the colors I used (with the exception of the teal; I decided not to use that one):
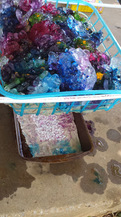
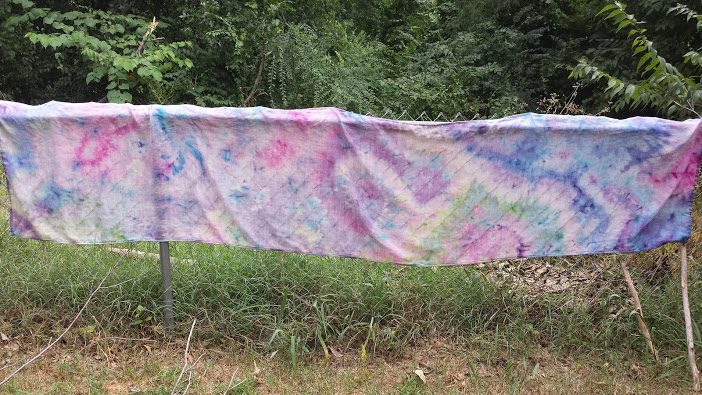
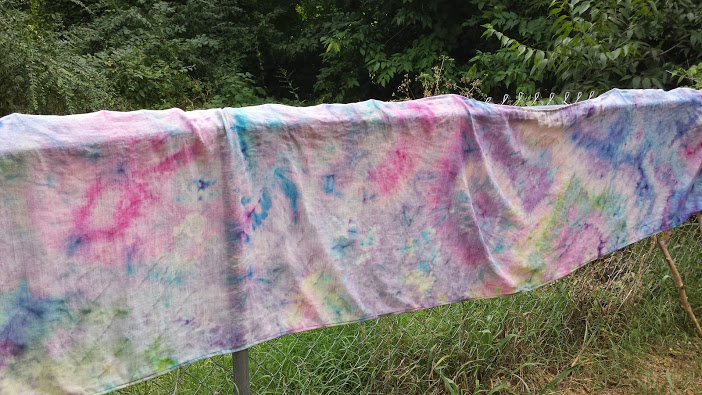
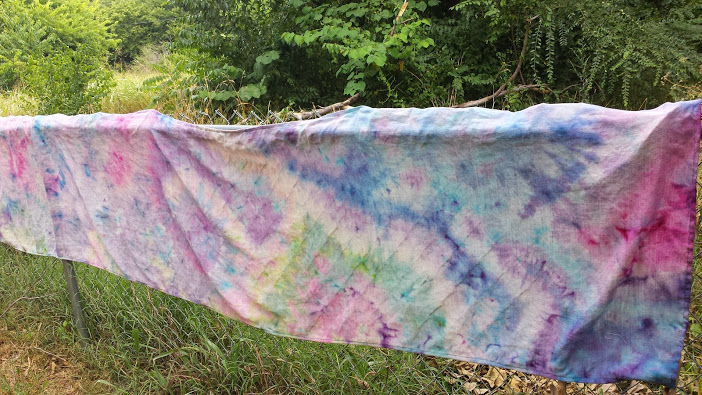
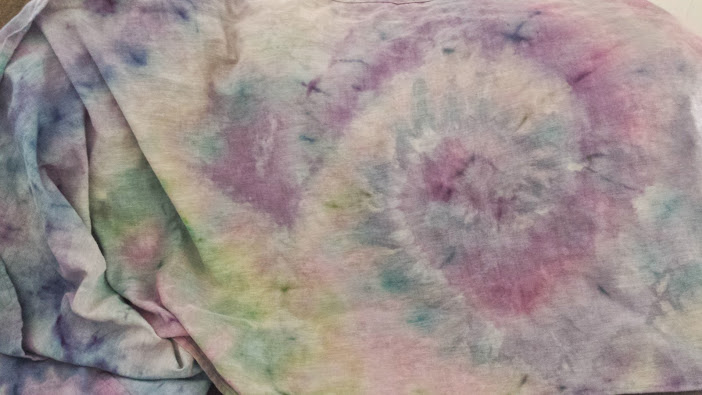
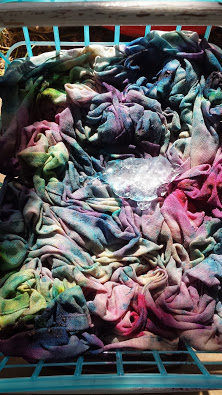 Almost completely melted Almost completely melted I like to place something in the drip tray, to catch the dye runoff. This time it was just a piece of scrap fabric with a glue resist design I was trying out. You might try placing a tea towel, bandana, dish cloth, etc. to see what you get from the drippings! The hardest part about ice dyeing is the wait. I recommend letting it sit for 24 hours minimum. Since it was a very hot day and the ice melted quickly, I had to add another batch of ice. A good indication that you need to add more ice is if you see clumps of dried dye on top of the fabric. You could also just spray those lightly with a spray bottle. They don't need to be full dissolved, but they won't penetrate the fabric like that, either. Just be careful that you do not dilute the dye any more than you absolutely need to. In this case, I do not think I had enough dye for this amount of fabric, and I may have diluted it too much with the extra ice. The best thing to do is to let it sit untouched for at least 12 hours after the last batch of ice (unless yours melted sooner). After the wait was FINALLY over, my nerves just couldn't wait a moment longer and I moved the fabric out to the front lawn, where I hosed it off. Surprisingly, I did not lose a lot of dye in the runoff, but after drying it in my dryer, I did notice that the colors were not as vibrant and looked a little faded, kind of pastel. However, I think it still looks great! What do you think?
0 Comments
Leave a Reply. |
Archives
August 2015
Past ProjectsCategories |

 RSS Feed
