|
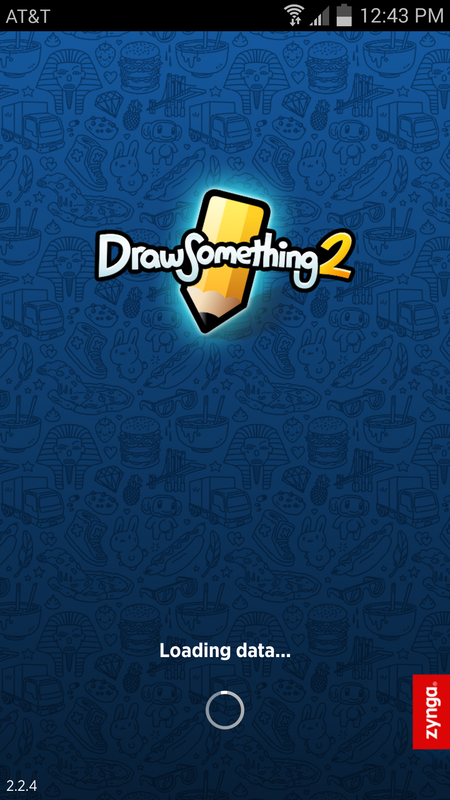
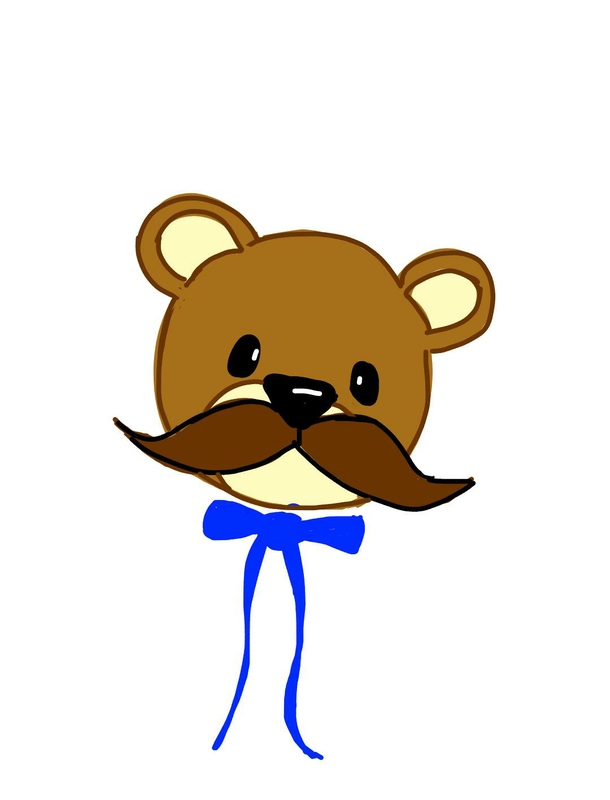
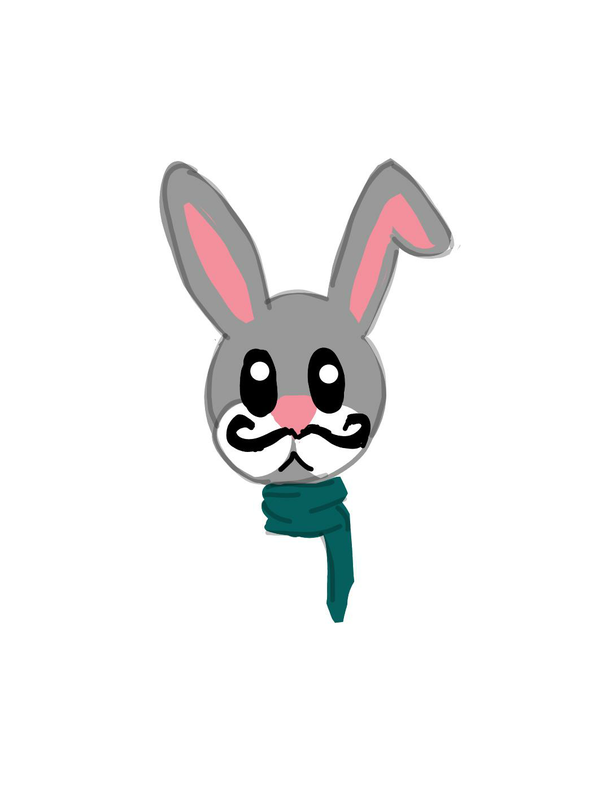
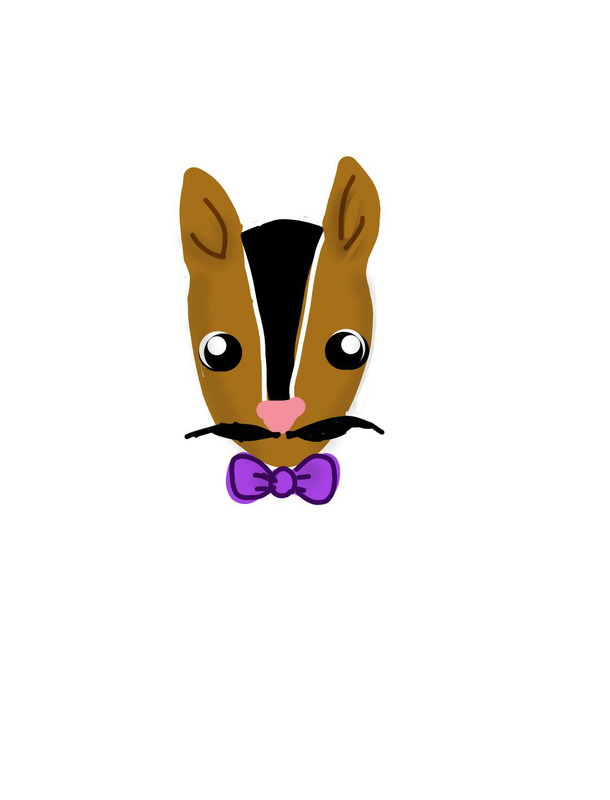
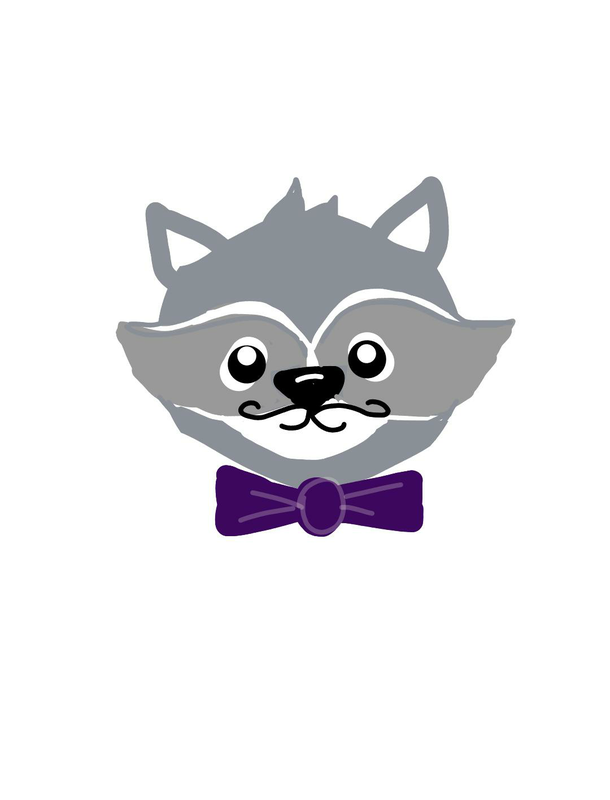
If you are afflicted with the incurable disease of fabric addiction as I am, you know that the worst thing in the world is when you find a print you like but then wish it came in another colorway, or that the background color wasn't quite so pink. Or, you have a great idea and want to make something subtle for your little boy and wish that you could find a My Little Pony fabric that's doesn't look like it was drowned in Pepto-Bismol. The answer to your dreams is Spoonflower.com. This is my latest hobby/obsession, and though the price tag might give you a shock, in the world of fabric, the possibility of having your own design printed on fabric is truly priceless. Not only that, but you also have to option to offer your fabric for sale to Spoonflower customers, a site that millions of people browse and order from. For a full tutorial on designing a fabric on Spoonflower, click on Read More: 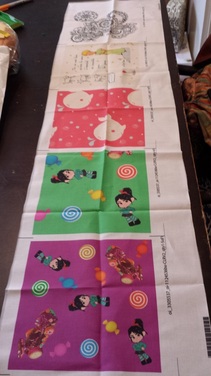 Sample swatches of my Spoonflower designs Sample swatches of my Spoonflower designs I first tried Spoonflower when they were hosting a special promotion and have been hooked ever since. There are so many amazing designs to browse through, and some of them are cut-and-sew projects, like dolls and puppets, or play food. I also found a cute LEGO print, which is significant, since the only LEGO fabrics I can find elsewhere are...well, ugly. I have also been able to find adorable Kawaii-inspired prints that are just adorable, although I am hoarding the one I have and can't seem to muster up the courage to cut into it. I started designing fabric when they had a free swatch promotion. I designed a Peruvian llama themed fabric under my personal account. My New Earth Design studio is now filled with designs, including one called Science Fair, which placed in the top 10 of Spoonflower's Weekly Contest (hundreds of entries!) and was featured on their homepage. My Floral Mandala has also been featured, as well as one of my ultimate favorites, Le Petit Prince. You can see my whole studio here. I have sold several yards and make a commission on every purchase, which promptly goes back to Spoonflower to feed my fabric addiction. (You and I both know it is pointless to resist.) If you have a basic knowledge of Photoshop, you can design today. If not, I will try to explain it as I go along. I use GIMP, which is a free photo editing software that you can download for free at www.gimp.org. To avoid copyright issues, stick to unlicensed or free images that are not copyrighted. You could also purchase clip art from sites like vectorstock.com, canstockphoto.com or even from deviantart.com, though you will need to contact the artist directly if you plan on reselling it, as some do not make their available for commercial use. There are some images available for free, and you can do a Google search for those, but I like to draw mine by hand, either by using GIMP or using an app on my smartphone, called Draw Something 2. It is technically a game like Pictionary, but there is a Free Draw option that allows you to draw using your finger or a stylus, and save it to your phone and/or email it and share it. I usually email it to myself and then get on my laptop, open and save it and then open it in GIMP. One example of this is my Mustached Woodland Animals design. Inspired by a mustache-themed weekly contest on Spoonflower, I doodled some cute animals with mustaches, using Draw Something 2 on my Galaxy S4. These were the drawings I made and emailed to myself, then downloaded and saved to my computer: I opened GIMP and selected "New." You can use the default size, which can be adjusted later on, but mine has the following resolution: 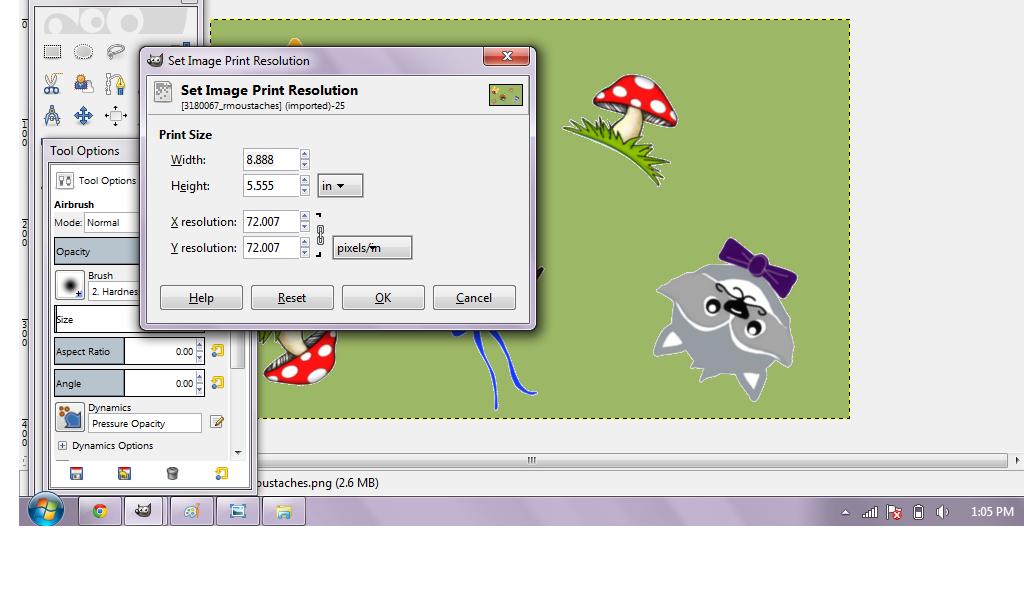 Obviously, that ^^^ is an "after" shot. Yours should be blank white. Next, you will select "Open" from the File menu. 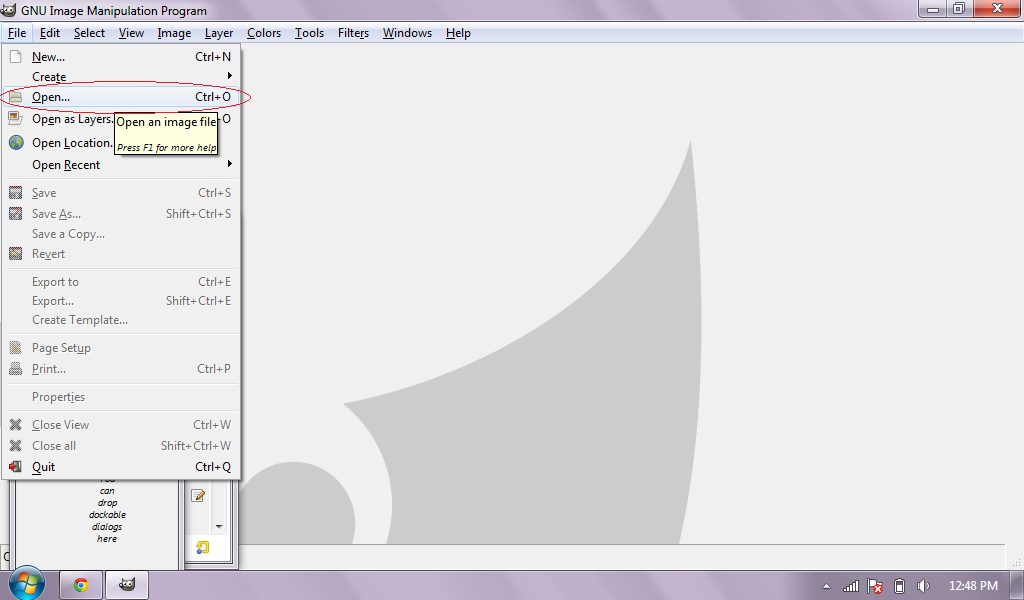 Select your image. It will open a new window. Trace around the image with either the square or circle tool, or use the freehand tool for irregular shapes. Right-click on the image and select "Copy". 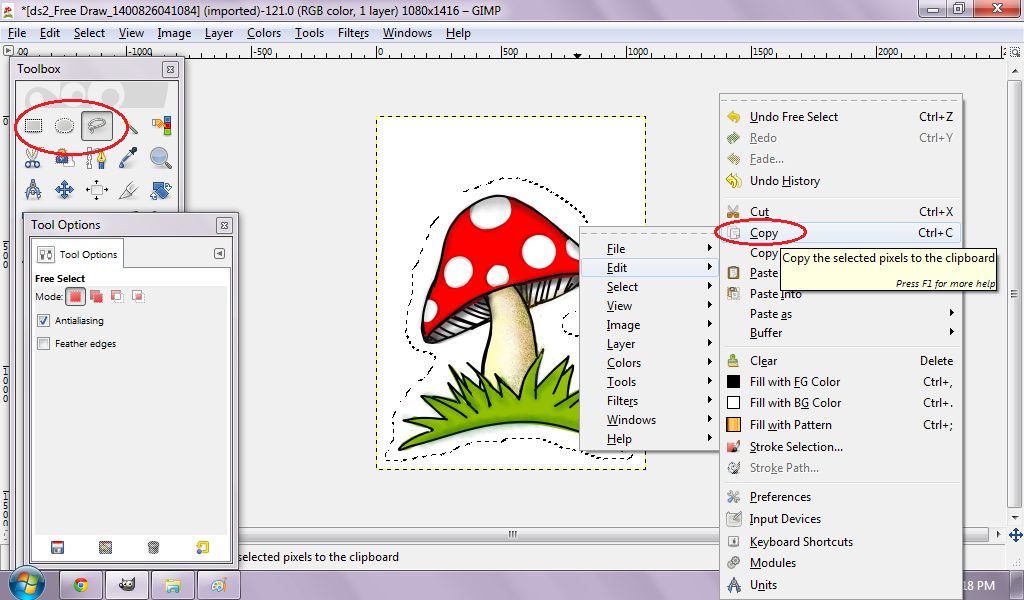 Click back to your blank canvas, right-click and select Paste (Ctrl+V). In your toolbox you have options to move, rotate, flip and scale the image. If it is too large, select "Scale Image" and drag the image to the desired size. For this design, I wanted a "tossed" look that is non-directional. This means that the fabric has no right side up and won't look upside-down. 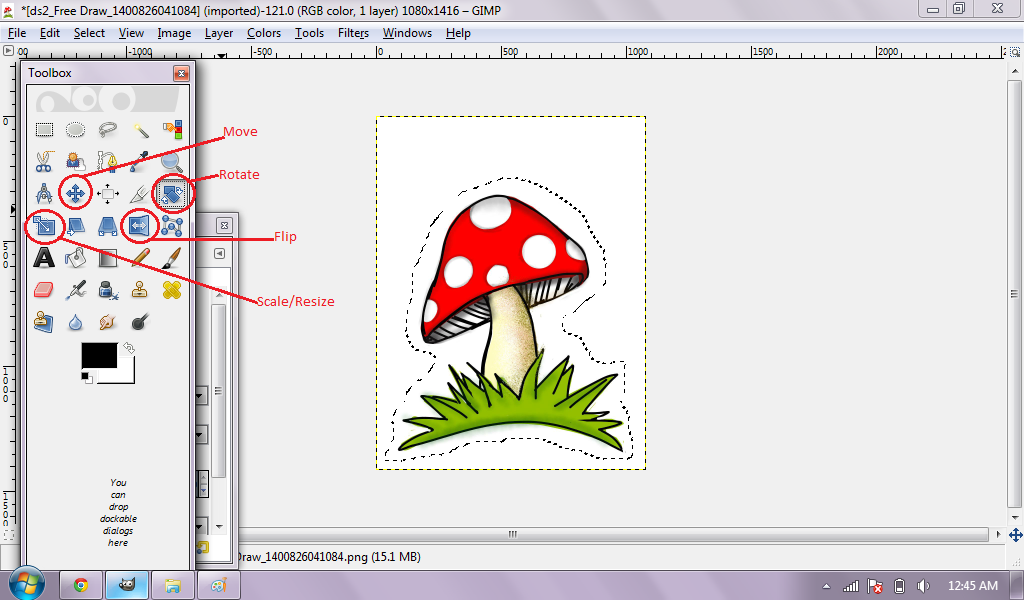 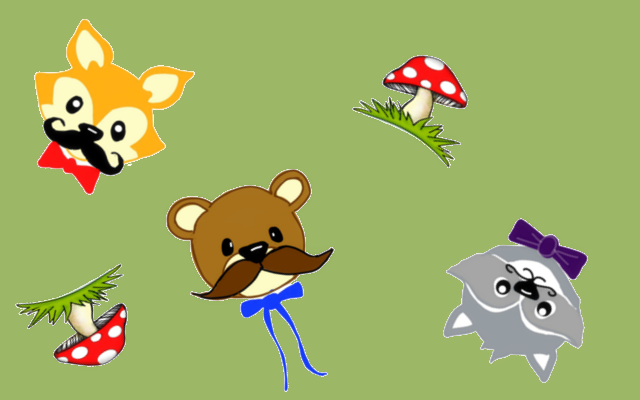 I eventually decided to make the background a green color and to use only 4 of my drawings. Once I was satisfied, I saved my image and exported it to a .png file. You can upload .png and .jpg files to Spoonflower. If you already have an account on Spoonflower.com, log in. If not, create a new account. Then click on "Create" at the top of the homepage. You will be guided through the uploading process, and it will show you a preview of what your fabric looks when it is tiled, or repeated. You will have options on the right-hand side of the page to adjust it. Play around with the settings to find one that you like; pay attention to the ruler on the border to ensure your image is not too big. You can also get a good idea of sizing by adjusting the fabric size. 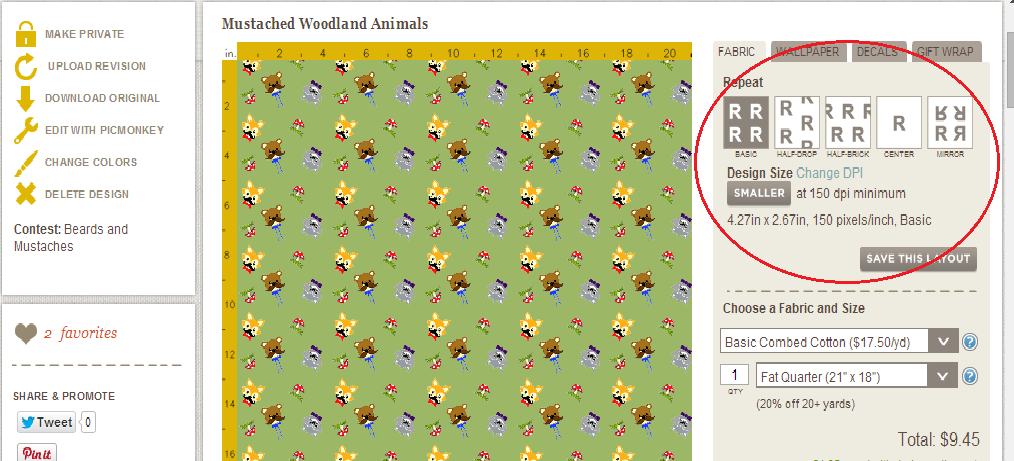 Scroll down and complete the fields for title, description, tags, etc. You will have an option at the bottom to choose to make your design public or private. When you are finished, hover over My Studio at the top and select "Design Library". You will see your design and have a few options in the dropdown menu. Once you have ordered a swatch of the design, you will have the option to make it available for sale in this menu. To order a swatch, you can either click on the print and add a swatch to your cart, or you can wait until you have a collection of designs, and order a swatch sampler. This saves you money and will make all of those prints available for sale as soon as they print and are shipped to you. So, there you have it. I hope this does not overwhelm you, and instead inspires you to try it! I have had loads of fun designing fabrics for the weekly contests and for my own personal use. Happy designing!
1 Comment
Shell
7/5/2014 12:30:25 am
This was extremely informational! At first I was going to comment, "hey I've used spoonflower. They had a cute frog set complete with eggs and tadpoles my father-in-law sewed for my son! As well as a robot for both kids" but you went on about how to MAKE your own fabric! And using Drawsomething 2! I've used it to draw my animals for my children's book for visually impaired children. Keep writing about cool stuff I didn't know about! Leave a Reply. |
Meet & GreetHi! My name is Astrid and I am an unschooling, working mama of 3 with an intense need to design, craft and create. Follow me for ideas, tutorials, DIY projects, homeschooling resources and more. Archives
March 2017
Categories
All
|


 RSS Feed
